You’ve just acquired a brand-new Z-Wave enabled smart device – perhaps an advanced dimmer switch from Inovelli, a robust door lock from Schlage, or a multi-sensor from Aeotec. Eager to integrate it into your smart home ecosystem, you power it on, place your Z-Wave primary controller (be it a Hubitat Elevation, a Home Assistant instance with a Z-Wave JS dongle, or a Google Nest Hub (Gen 2) acting as a Thread/Matter gateway which might interact with Z-Wave via a separate bridge) into “Inclusion Mode,” activate the device’s pairing sequence, and… nothing. The controller remains unresponsive. You repeat the process, perhaps even restart the hub, but the outcome is the same. Frustration mounts, and the thought of the device being “defective” crosses your mind.
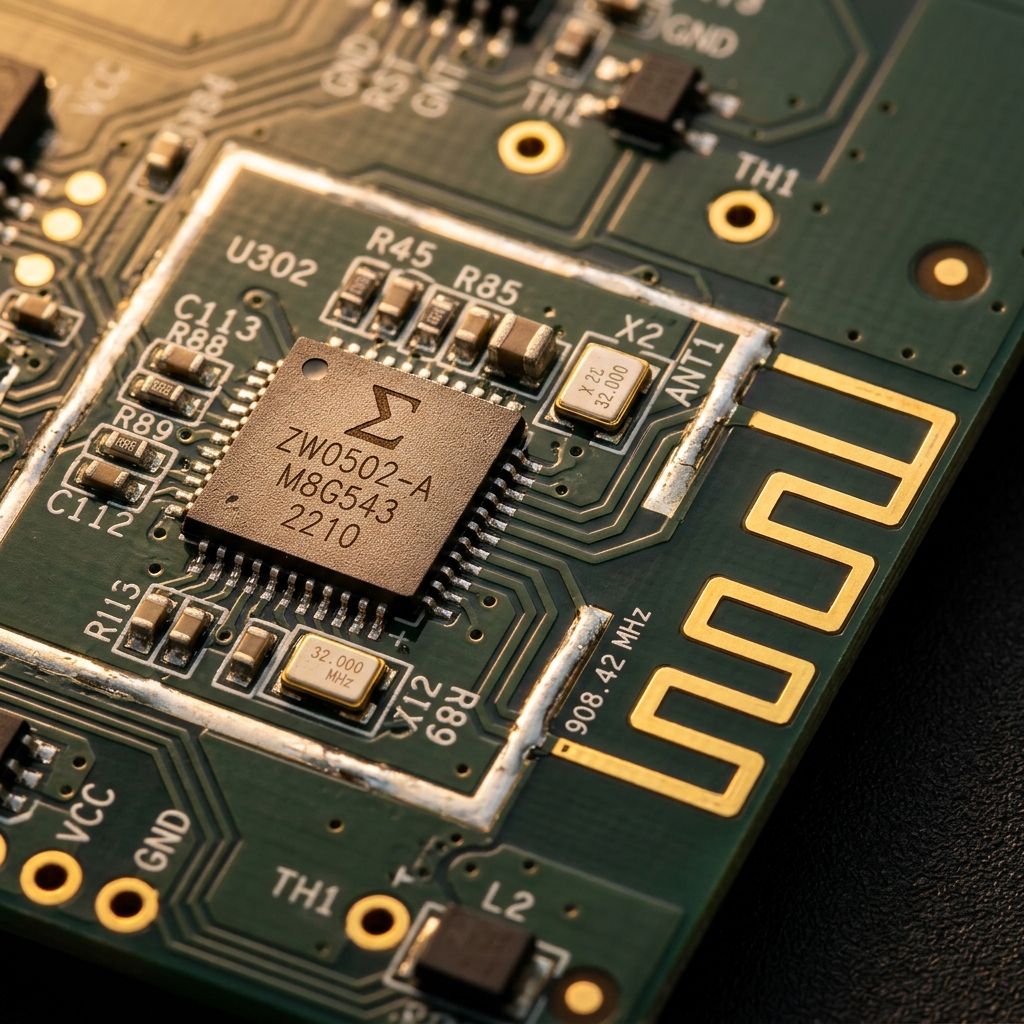
As a seasoned IoT systems architect, I’ve witnessed this scenario countless times in both residential and commercial deployments. Z-Wave, despite its robust mesh networking capabilities and operation in the less congested sub-GHz frequency bands (e.g., 908.42 MHz in North America, 868.42 MHz in Europe), possesses a pairing mechanism that can be surprisingly “sticky.” If you’re consistently encountering difficulties adding new devices, the most probable cause is the omission of the single most counter-intuitive, yet absolutely essential, step in the Z-Wave inclusion protocol: pre-emptive exclusion.
+---------------------------+
|     Device Won't Pair?    |
+---------------------------+
             ↓
+---------------------------+
| Step 1: Execute General   |
|         Exclusion Mode    |
|   (Purge factory "ghost"  |
|         data from NVM)    |
+---------------------------+
             ↓
+---------------------------+
| Step 2: Optimal Proximity |
|           Pairing         |
|   (Hub within 1-3 feet for|
|      robust NIF handshake)|
+---------------------------+
             ↓
+---------------------------+
|   Successful Inclusion &  |
|     Network Integration   |
+---------------------------+
The Golden Rule: Always “Exclude” First – A Deep Dive into Z-Wave’s NVM
This is not merely a tip; it is the fundamental principle that resolves the vast majority of Z-Wave pairing conundrums. Every Z-Wave device, whether a controller or a slave, stores its network identity in its Non-Volatile Memory (NVM). This NVM holds crucial identifiers: the Home ID and the Node ID. The Home ID (a 32-bit identifier) uniquely identifies a Z-Wave network, while the Node ID (an 8-bit identifier) uniquely identifies a specific device within that network.
A Z-Wave device can only ever be associated with *one* Home ID at any given time. This design choice ensures network integrity and prevents devices from accidentally joining unauthorized networks or creating routing conflicts. When a device is manufactured, it undergoes quality control and functional testing. During this process, it’s common for devices to be temporarily included into a factory test network. While manufacturers *should* perform an exclusion before packaging, this step is sometimes missed, or the exclusion process itself might not fully clear the NVM. Consequently, a “brand new” device can arrive with residual Home ID and Node ID data, effectively believing it is still part of a long-gone factory network.
When you attempt to include such a device into your home network, it refuses. Its NVM already contains a Home ID, and the Z-Wave protocol dictates that a device must first be disassociated from any existing network before it can join a new one. The exclusion command sends a specific Z-Wave frame that instructs the device to purge its stored Home ID and Node ID from its NVM, returning it to an unassociated, factory-fresh state from a network perspective.
How to Execute Exclusion on Major Z-Wave Platforms
The process for initiating a Z-Wave exclusion is similar across most modern Z-Wave controllers. The key is to activate the hub’s exclusion mode, then follow the device-specific button press sequence (often a single, triple, or five-tap of its primary button).
- Home Assistant (Z-Wave JS UI or Z-Wave JS): Navigate to
Settings > Devices & Services > Z-Wave > Configure > Remove Device(orManage > Advanced Actions > Remove Failed Nodefor ghost nodes). Once activated, the controller will listen for exclusion commands for 30-60 seconds. - Hubitat Elevation: Go to
Devices > Z-Wave Details > Z-Wave Exclude. The hub will enter a listening state for 30 seconds. - Samsung SmartThings (New App): Open the Hub in the app, tap the three dots
... > Z-Wave Utilities > Z-Wave Exclusion. - Vera (Plus/Secure): Navigate to
Devices > Add Device > Other Devices > Z-Wave > Exclude. - Aeotec Z-Stick Gen5/7 (as secondary controller or for direct exclusion): Press the button on the stick once to enter exclusion mode, then activate the device.
Upon successful exclusion, your controller should confirm “1 device excluded” or similar, and the device itself might flash an LED or beep to indicate it has been reset.
Distance Matters: The Critical “Whisper Pairing” Phase and RF Fundamentals
While Z-Wave’s mesh networking topology provides impressive range and reliability once established, the initial inclusion phase operates under different, more stringent conditions. This is often referred to as “whisper pairing” or “network-wide inclusion” proximity requirement. The reason lies in the fundamental physics of Radio Frequency (RF) communication and the specific requirements of the Z-Wave protocol’s initial handshake.
RF Physics and the Initial Handshake
- Signal Attenuation: RF signals lose strength exponentially with distance (inverse square law) and linearly with obstacles (walls, furniture, water pipes). During inclusion, the device needs to transmit its Node Information Frame (NIF) and subsequently exchange security keys with the primary controller. A weak signal (low RSSI – Received Signal Strength Indicator) can lead to packet loss, retransmissions, and ultimately, timeouts.
- Multipath Fading: In indoor environments, RF signals bounce off surfaces, creating multiple paths for the signal to reach the receiver. These paths can arrive out of phase, leading to constructive or destructive interference, causing signal strength fluctuations. During initial pairing, a consistent, strong direct path is highly desirable.
- Fresnel Zone: For optimal signal propagation, the primary Fresnel zone between the transmitting device and the receiving controller should be clear of obstructions. Obstacles within this ellipsoidal region can cause significant signal degradation.
- Link Quality Indicator (LQI): Beyond raw signal strength (RSSI), LQI assesses the quality of the received signal, accounting for noise and interference. For a successful, error-free initial handshake, both high RSSI and LQI are crucial.
Unlike regular Z-Wave communication where messages can hop across multiple routing nodes to reach the controller, the initial inclusion process often requires a direct, robust communication link between the new device and the primary controller. This is particularly true for older Z-Wave (non-Plus) devices, S0 security devices, or high-security devices like door locks (e.g., from Schlage, Yale, Kwikset) that necessitate a secure key exchange during inclusion. These processes are highly sensitive to latency and packet loss.
| Device Type & Security | Recommended Max Pairing Distance | Technical Justification |
|---|---|---|
| Standard Z-Wave Plus (S0/Unauthenticated S2) | 5-10 feet (1.5-3 meters) | Generally robust, but close proximity ensures high RSSI for efficient NIF exchange and initial network key negotiation. Less critical if SmartStart is used. |
| S2 Authenticated / S2 Access Control (e.g., Locks) | 1-3 feet (0.3-1 meter) | Whisper Pairing is often mandatory. The complex Elliptic Curve Diffie-Hellman (ECDH) key exchange and DSK verification require an extremely stable, high-bandwidth (for Z-Wave standards) RF link to prevent timeouts and cryptographic failures. |
| FLiRS Devices (e.g., Battery Thermostats) | 3-5 feet (1-1.5 meters) | While not as critical as S2 locks, FLiRS (Frequently Listening Routing Slaves) devices wake up briefly to listen for messages. A strong signal ensures the NIF and subsequent commands are received during these short wake periods. |
Therefore, even though your Z-Wave network might eventually span an entire multi-story home, the initial inclusion of a device should ideally occur with the primary controller positioned within 1 to 3 feet of the device. For devices that are difficult to move (e.g., in-wall switches, installed door locks), consider temporarily moving your hub, or using a long Ethernet cable if your hub supports remote placement from its network switch.
Z-Wave Security Tiers: S0, S2, SmartStart, and Their Operational Impact
Z-Wave has evolved significantly in its security capabilities, moving from the earlier S0 security to the robust S2 framework, and more recently, the streamlined SmartStart inclusion method. Understanding these tiers is crucial for effective network management and troubleshooting.
S0 Security (Legacy)
Introduced early in Z-Wave’s history, S0 security provides basic encryption. However, it suffers from several limitations:
- Vulnerabilities: S0 is susceptible to replay attacks and packet sniffing if the network key is compromised. While better than no security, it’s not considered robust by modern standards.
- Overhead: Each S0 encrypted frame requires three separate Z-Wave packets for transmission: one for the encrypted data, one for the acknowledgment, and one for the security nonce exchange. This triples the network traffic and significantly increases latency, especially in large networks or with battery-powered devices.
- Resource Intensive: The encryption/decryption process, while simple, still adds computational load to both the device and the controller.
For these reasons, S0 security is generally discouraged for new installations, particularly for critical devices like locks or garage door openers. Many modern Z-Wave Plus v2 (700 series) controllers will attempt to include S0 devices with no security if S2 is not available, or only as a last resort.
S2 Security (Modern Standard)
Introduced with Z-Wave Plus v2 (700 series) devices, S2 security represents a significant leap forward. It leverages Elliptic Curve Diffie-Hellman (ECDH) for a secure key exchange during inclusion and AES-128 encryption for all subsequent communication.
- Enhanced Security: S2 provides true end-to-end encryption, protecting against man-in-the-middle attacks, eavesdropping, and replay attacks. It’s on par with industry-standard security protocols.
- Reduced Latency: Unlike S0’s multi-packet exchange, S2 achieves secure communication with minimal overhead, often just a single acknowledgment. This makes S2 networks faster and more responsive.
- Security Classes: S2 offers different levels of security, often determined by the device’s function:
- S2 Unauthenticated: Provides encryption but does not require a Device Specific Key (DSK) during inclusion. Suitable for less critical devices like light bulbs or basic switches.
- S2 Authenticated: Requires the input of the full 10-digit Device Specific Key (DSK, often presented as 5 pairs of hexadecimal characters) or scanning a QR code during inclusion. This verifies the device’s authenticity and ensures a secure key exchange. Essential for critical devices like door locks, garage door openers, and security sensors.
- S2 Access Control: A specific class for devices that control access (e.g., locks). It mandates the highest level of security and authentication.
While S2 is highly recommended, the DSK entry or QR code scan must be completed within a specific timeout window during inclusion. Failure to do so can result in partial inclusion, a “ghost” node, or the device attempting to fall back to a lower security level (e.g., S0 or no security), which might not be desired.
SmartStart
SmartStart is a feature built upon S2 security, designed to simplify and streamline the inclusion process. Devices supporting SmartStart have a QR code (containing the DSK) that can be scanned and pre-provisioned in the controller’s software *before* the device is even powered on or in range.
- Zero-Touch Inclusion: Once pre-provisioned, simply powering on the SmartStart device within range of the controller will automatically include it into the network with S2 security, without needing to put the controller into inclusion mode or press buttons on the device.
- Reduced Pairing Headaches: This greatly mitigates the “whisper pairing” issue, as the DSK exchange is handled beforehand, and the device can join the network more passively.
- Network Resiliency: SmartStart devices retain their network information even after factory resets, allowing for easier re-inclusion without re-entering the DSK.
Troubleshooting Advanced Z-Wave Inclusion Challenges and Network Health
Even with exclusion and proximity optimized, Z-Wave networks can present unique challenges. A holistic understanding of network health, device characteristics, and environmental factors is crucial for advanced troubleshooting.
| Problem | Probable Cause | Quick Fix / Diagnostic |
|---|---|---|
| Device won’t include | Residual NVM data (“ghost” configuration) | Always Exclude First. Perform general exclusion on hub, then device. |
| Inclusion fails / “Ghost Node” created | Weak RF signal during pairing (not enough “whisper”) | Move hub within 1-3 feet (0.3-1m) of device for “whisper pairing.” |
| S2/SmartStart DSK timeout | DSK not entered/scanned within the controller’s timeout window | Re-initiate inclusion. Enter DSK/scan QR code immediately upon prompt. |
| Network slow or unresponsive | Ghost nodes, inefficient routing, S0 security overhead, RF interference | Remove ghost nodes, run network heal, minimize S0 if possible, check for interference. |
| Battery-powered device unresponsive | Low battery, device sleeping, weak signal during wake-up | Replace batteries with fresh ones. Manually wake device during inclusion/configuration. |
Ghost Nodes: The Persistent Problem
A “ghost node” occurs when a Z-Wave device is partially included or fails to complete inclusion, leaving an entry in the controller’s routing table without a fully functional device attached. These ghost nodes can severely degrade network performance:
- Routing Table Pollution: They occupy a Node ID, preventing other devices from using it.
- Failed Routes: The controller might attempt to route traffic through a ghost node, leading to message delays and failures.
- Network Instability: Repeated attempts to communicate with a non-existent node can consume controller resources and cause network slowdowns.
Removal: Often requires a “force remove” option in your controller’s Z-Wave utility, followed by a network heal. In stubborn cases, manually editing the Z-Wave JS configuration files (nodes.json) might be necessary, but this is an advanced procedure with risks.
Network Healing and Mesh Optimization
Once devices are included, the Z-Wave mesh network automatically builds routing tables. However, these tables are not always optimal, especially after adding new nodes, removing old ones, or physically relocating devices. A “network heal” (also called “repair network” or “reorganize network”) command instructs the controller to:
- Discover Neighbors: Each node re-scans its RF environment to identify adjacent Z-Wave devices.
- Update Routing Tables: Nodes update their internal routing information, finding the most efficient paths to other nodes and the controller.
- Optimize Routes: The controller can then use this updated information to build more robust and efficient communication paths, reducing latency and improving reliability.
It’s good practice to run a network heal after significant changes to your Z-Wave topology (e.g., adding 3+ devices, moving the controller, or experiencing routing issues).
Power Considerations: Battery vs. Mains-Powered Devices
- Mains-Powered Devices (Always On): Switches, dimmers, outlets, and some sensors are constantly powered and act as Z-Wave repeaters, strengthening the mesh. They are always listening for commands.
- Battery-Powered Devices (FLiRS / Sleeping): Sensors, locks, and thermostats are typically battery-powered. To conserve energy, they “sleep” most of the time. FLiRS (Frequently Listening Routing Slaves) devices wake up briefly at regular intervals (e.g., 250ms) to check for messages, acting as non-routing repeaters for specific messages. Standard sleeping devices only wake up on specific events or at long intervals.
- Inclusion Impact: Battery-powered devices, especially non-FLiRS, can be challenging to include if their wake-up intervals are too long or if their batteries are low. Low battery voltage can significantly reduce RF transmit power, making the initial NIF broadcast too weak to be reliably received by the controller. Always use fresh, high-quality batteries (CR123A, AA, AAA) for battery-powered devices during inclusion.
Firmware Updates and Device Compatibility
Device firmware updates can sometimes alter pairing behavior, security capabilities, or even reset network configuration. Always check for the latest firmware and release notes. Ensure your devices and controller are within the same Z-Wave region/frequency (e.g., US: 908.42 MHz, EU: 868.42 MHz). Mismatched frequencies will prevent any communication.
Environmental RF Interference
While Z-Wave’s 900MHz band is less congested than 2.4GHz Wi-Fi/Zigbee/Thread, it’s not immune to interference:
- Other 900MHz Devices: Cordless phones, baby monitors, some wireless security cameras, and older long-range RF devices can operate in the same band, causing co-channel or adjacent-channel interference.
- Electrical Noise: High-power motors, faulty fluorescent ballasts, unshielded power supplies, and even some LED drivers can generate broadband electrical noise that interferes with RF communication.
- Physical Obstructions: Large metal objects, concrete walls with rebar, and dense insulation can attenuate Z-Wave signals.
Identifying and mitigating these sources, perhaps by relocating devices or using RF shielding, can dramatically improve network stability.
Step-by-Step Master Inclusion Protocol for Z-Wave Devices
Based on extensive field experience, this is the most reliable protocol for integrating new Z-Wave devices into any smart home ecosystem.
- Pre-Inclusion Preparation & System Health Check
- Verify Device Compatibility: Confirm the device is Z-Wave certified and compatible with your specific controller model (e.g., Z-Wave Plus v2 device with a 700 series controller for optimal performance).
- Fresh Power Source: For battery-powered devices, install brand-new, high-quality batteries. For mains-powered devices, ensure they are connected to a stable power supply.
- Controller Status: Ensure your Z-Wave controller (hub) is online, healthy, and has the latest firmware. Check its logs for any existing Z-Wave errors or “ghost” nodes that need clearing first.
- Environmental Scan (Optional but Recommended): If persistent issues, consider using an RF spectrum analyzer (or a less precise Wi-Fi analyzer in 2.4GHz to identify general congestion patterns, though Z-Wave is sub-GHz) to identify potential interference sources near the intended device location.
- Execute Mandatory General Exclusion Mode
This is the most critical step. Even for brand-new devices, perform a general exclusion first.
- Activate Exclusion on Controller: Navigate to your hub’s Z-Wave exclusion utility (see “How to Exclude” section above). The controller will enter a listening state.
- Activate Exclusion on Device: While the controller is listening, perform the device’s specific exclusion sequence (e.g., triple-tap, single-tap, or press-and-hold its primary button). Refer to the device’s manual.
- Verify Exclusion: Your controller should confirm “1 device excluded” or similar. The device might flash an LED or beep. If it doesn’t confirm, repeat the device’s exclusion sequence. If still no confirmation, try factory resetting the device (refer to its manual, as this varies widely) and then re-attempt exclusion.
- Optimal Proximity Positioning for Inclusion (“Whisper Pairing”)
- Relocate Controller: Physically move your Z-Wave primary controller to within 1 to 3 feet (0.3 to 1 meter) of the device you wish to include. Avoid placing it directly on metal surfaces.
- Clear Line of Sight: Minimize obstructions between the device and the controller during this phase.
- Initiate Inclusion & Secure Key Exchange (DSK/QR)
- Activate Inclusion on Controller: Navigate to your hub’s Z-Wave inclusion utility (e.g., “Add Device,” “Start Z-Wave Inclusion”). The controller will enter a listening state.
- Activate Inclusion on Device: Perform the device’s specific inclusion sequence (e.g., triple-tap, single-tap, or press-and-hold). Again, consult the device manual.
- DSK/QR Code Input (for S2 devices): If prompted by your controller, immediately enter the full 10-digit Device Specific Key (DSK, often presented as 5 pairs of hexadecimal characters) from the device’s manual/packaging or scan the QR code. Do this quickly to avoid timeouts. Select the desired S2 security class (Authenticated, Unauthenticated, or Access Control) if given the option. For non-critical devices, “No Security” might be an option on some controllers, reducing overhead.
- Verify Inclusion: The controller should confirm successful inclusion, often showing the device’s name and assigned Node ID. The device might flash an LED.
- Post-Inclusion Verification & Network Optimization
- Device Functionality Test: Immediately test all functions of the newly included device (e.g., toggle light, read sensor data, lock/unlock).
- Relocate Controller (if moved): Return your Z-Wave controller to its optimal, central location.
- Run Network Heal: Once all devices are physically installed and included, execute a “Network Heal,” “Repair Network,” or “Reorganize Network” command on your controller. This allows the new node(s) to discover their neighbors and for the entire mesh to optimize its routing tables, ensuring robust and efficient communication pathways. This may take several minutes to complete.
- Monitor Device Health: After the heal, check your controller’s Z-Wave details page for the newly added device’s RSSI, LQI, and routing path to ensure optimal connectivity.
- Advanced Troubleshooting Loop (If Inclusion Fails Repeatedly)
- Re-Exclusion: Always start by re-running the exclusion process (Step 2).
- Factory Reset Device: Perform a hardware factory reset on the device itself (check manual for procedure). This is distinct from Z-Wave exclusion and wipes all device settings.
- Try “No Security” (Caution): If inclusion consistently fails with S2, and the device is non-critical, try pairing with “No Security” if your hub offers the option. This can help diagnose if the issue is S2-related.
- Check Controller Logs: Dive into your hub’s detailed Z-Wave logs for specific error codes or messages during the inclusion attempt.
- Temporary Repeater: If the device is far from the hub, temporarily place a known-good, mains-powered Z-Wave repeater (e.g., a smart plug) halfway between the hub and the problematic device, then attempt inclusion.
- Isolate Device: If you suspect a faulty device, try pairing it with a different, known-good Z-Wave controller (if available) to rule out device defects.
Frequently Asked Questions (FAQ) about Z-Wave Inclusion & Network Management
Q1: What if my brand new device won’t exclude, even after multiple attempts?
A1: If a brand-new device refuses to exclude, it might be stuck in a specific state or have very stubborn factory data. First, try a hardware factory reset of the device itself (consult its manual for the specific button sequence, as this varies by manufacturer). This will typically clear all internal memory. After the factory reset, immediately attempt the exclusion process again. If it still fails, there’s a small chance the device is genuinely defective, or it might be a regional frequency mismatch (e.g., an EU device in a US network).
Q2: Can I pair a Z-Wave device without a dedicated Z-Wave hub or controller?
A2: No. Z-Wave devices require a primary controller (hub) to form a network, assign Home IDs and Node IDs, and manage communication. While some devices can operate in a “direct association” mode after being included in a network, they cannot initially pair or function autonomously without a controller. Unlike Wi-Fi devices that connect directly to a router, Z-Wave creates its own mesh network managed by a central controller.
Q3: What’s the difference between “Z-Wave” and “Z-Wave Plus”?
A3: Z-Wave Plus refers to devices built on the 500 series Z-Wave chip (Gen5) and later. These devices offer several enhancements over older Z-Wave (300 series/Gen3) devices:
- Extended Range: Up to 150 feet (45 meters) line of sight, compared to 100 feet (30 meters) for older Z-Wave.
- Improved Battery Life: 50% improvement for battery-powered devices.
- Faster Inclusion: Up to 250% faster inclusion speed.
- Increased Bandwidth: Higher data rates for more efficient communication.
- Network Wide Inclusion: Easier inclusion of devices that are not in direct proximity to the controller, though “whisper pairing” is still recommended for initial setup.
- Standardized NIF: More consistent Node Information Frames for better compatibility.
Q4: Why does my Z-Wave network seem to get slower or less responsive over time?
A4: Several factors can contribute to network degradation:
- Ghost Nodes: Unremoved partial inclusions can pollute routing tables.
- Device Relocation: Moving devices without running a network heal can create inefficient or broken routes.
- New Interference: New 900MHz devices or electrical noise sources can introduce RF interference.
- S0 Security Overload: Too many S0 devices can saturate the network with excessive traffic.
- Aging Batteries: Weak batteries in routing devices can lead to unreliable repeating.
- Controller Strain: An overloaded or underpowered controller (especially for large networks or complex automations) can struggle with command processing.
Q5: How often should I run a Z-Wave network heal?
A5: A network heal is not something you need to do daily or weekly. It’s recommended in these scenarios:
- After adding or removing several Z-Wave devices (3 or more).
- After physically relocating your Z-Wave controller or any mains-powered Z-Wave devices.
- If you are experiencing unexplained delays, unresponsive devices, or routing issues.
- As a general maintenance step, perhaps once every few months for a stable network, or more frequently during initial setup and expansion.
Q6: Can I mix S0 and S2 devices within the same Z-Wave network?
A6: Yes, Z-Wave networks are backward compatible, meaning an S2-capable controller can manage both S0 and S2 devices, as well as older non-secure devices. However, communication between an S2 device and an S0 device (or vice-versa) will always occur at the lowest common security denominator, typically S0. This means that even if you have an S2 controller and S2 devices, if a message needs to route through an S0 device, that segment of the communication might default to S0 security and its associated overhead. For optimal performance and security, it’s best to migrate towards a predominantly S2-enabled network.
Conclusion: The Foundation of a Robust Z-Wave Network
The seemingly trivial act of performing a Z-Wave exclusion before inclusion is, in reality, the cornerstone of building a reliable, responsive, and resilient smart home network. By understanding the underlying protocol mechanics—the role of Non-Volatile Memory, Home IDs, Node IDs, and the critical “whisper pairing” phase—you gain the power to diagnose and resolve the most common Z-Wave pairing frustrations. Coupled with a grasp of modern security protocols like S2 and SmartStart, and an awareness of network health best practices like healing and ghost node management, you are equipped to architect and maintain a truly robust Z-Wave ecosystem.
Remember, Z-Wave is a powerful and reliable protocol precisely because of its structured approach to network management. Embrace the “Exclusion Before Inclusion” mantra, optimize your pairing environment, and watch your smart home aspirations seamlessly come to life.
About the Author: Sotiris
Sotiris is a senior systems integration engineer and home automation architect with 12+ years of professional experience in enterprise network administration and low-voltage control systems. He has custom-designed and troubleshot home automation networks for hundreds of properties, specializing in RF link analysis, local subnet isolation, and secure local IoT integrations.