Security Camera Night Vision Grainy or Washed Out
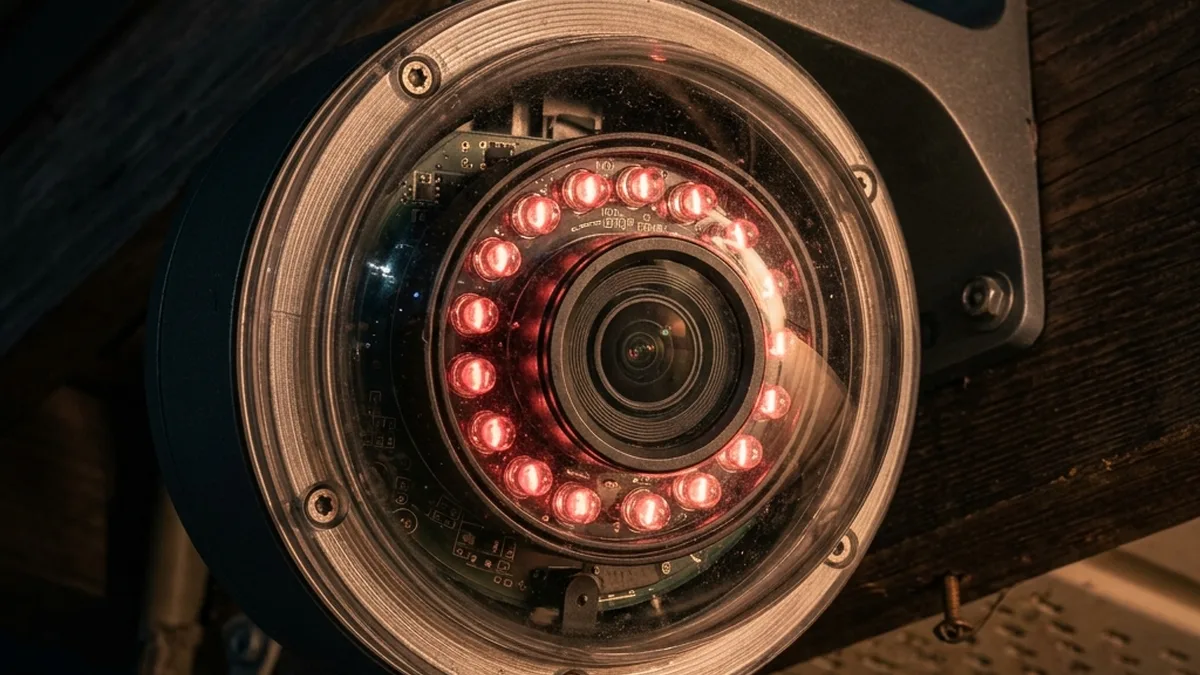
By day, your 4K smart camera looks like a Hollywood production. But the moment the sun goes down, it transforms into a grainy mess. If you can’t tell the difference between a dog and a person at night, your system is a high-tech paperweight. The secret isn’t more megapixels; it’s physics.
A $300 camera can easily look worse at night than an old analog unit, and the reason is rarely the sensor. Night vision relies on Infrared (IR) light and sensor sensitivity. Let’s clean up that feed.
Quick Verdict: Grainy Night Vision Root Causes & Fixes
Grainy night vision is primarily a function of insufficient light capture, exacerbated by poor image processing and network bandwidth limitations. The most common culprits are external IR reflection, inadequate sensor size, excessive digital gain, and insufficient video bitrate.
- External Reflection: Reposition camera to avoid IR bounce-back from walls, eaves, or glass.
- Sensor Limitations: For true low-light performance, prioritize cameras with larger sensors (e.g., 1/1.8″ or 1/2.7″ with “Starlight” technology) over higher megapixel counts.
- Image Processing: Manually adjust or disable Auto Gain Control (AGC) and enable True Wide Dynamic Range (WDR). Utilize 3D Digital Noise Reduction (3DNR) judiciously.
- Network Bitrate: Increase camera’s night profile bitrate (e.g., to 4096 Kbps or higher for H.264, 2048 Kbps for H.265) to prevent compression artifacts on noisy low-light footage.
- External IR: Supplement with a dedicated external IR illuminator for better, more uniform coverage, especially when shooting through glass.
Addressing these fundamental issues, rather than just tweaking basic settings, is key to achieving clear, identifiable night footage.
Low-Light Quality Optimizer
Clean Lens / Check Reflection
Increase Bitrate to 4Mbps
Enable True WDR
The Science of Night Vision: Sensors, Illumination, and Image Processing
Understanding why your camera struggles in low light requires a dive into the fundamental physics of light capture and digital signal processing. It’s not just about turning on an “IR mode”; it’s about managing photons, electron conversion, and data compression.
Infrared Illumination: The Invisible Light Source
Most security cameras rely on Infrared (IR) light to “see” in the dark. This light, invisible to the human eye, falls outside the visible spectrum (typically 700 to 1000 nanometers). Cameras use an IR cut filter during the day to block this light, ensuring accurate color representation. At night, this filter retracts, allowing the sensor to capture IR light emitted by the camera’s built-in LEDs or external illuminators.
- Wavelengths:
- 850nm: The most common wavelength. Produces a faint red glow visible to the human eye, but offers superior illumination range and efficiency for most CMOS/CCD sensors.
- 940nm: Completely invisible to the human eye, making it more covert. However, 940nm IR typically has about 30-40% less effective range than 850nm for the same power output, as camera sensors are generally less sensitive to this wavelength. This often results in a dimmer, grainier image unless paired with a highly sensitive sensor or powerful illuminator.
- Power Output & Angle: The effective range and spread of IR light depend on the LED power (measured in milliwatts, mW) and the beam angle. A wider angle (e.g., 90°) covers more area but with less intensity per unit area, while a narrower angle (e.g., 30°) concentrates light for longer distances.
- IR Reflection & Absorption: Different materials reflect or absorb IR light differently. Light-colored, smooth surfaces (like white walls, glass, or polished metal) are highly reflective, while dark, textured surfaces (like asphalt, dark fabric, or foliage) absorb more. This differential reflection is crucial to understanding why nearby objects can “blind” your camera.
Image Sensor Technology: Capturing the Faint Glow
The heart of any digital camera is its image sensor, typically a CMOS (Complementary Metal-Oxide-Semiconductor) chip. Its ability to convert photons into electrical signals directly dictates low-light performance.
- Pixel Size: This is arguably the most critical factor for night vision. Larger pixels (measured in micrometers, µm) have a greater surface area to “catch” photons. A 2-megapixel (MP) camera with a large 1/1.8″ sensor might have pixels around 2.8 µm, while an 8MP (4K) camera with a smaller 1/3″ sensor might have pixels closer to 1.4 µm. The larger pixels on the 2MP sensor can collect significantly more light, leading to a much cleaner image in low-light conditions, despite the lower resolution.
- Back-Side Illumination (BSI): Many modern sensors employ BSI technology, where the wiring and circuitry are moved to the back of the sensor, allowing light to strike the photodiode directly. This significantly increases Quantum Efficiency (QE), meaning a higher percentage of incoming photons are converted into electrons, improving low-light sensitivity.
- Low-Light Sensitivity (Lux): Camera specifications often list a minimum illumination level in lux (lx). A lower lux rating (e.g., 0.001 lux) indicates better low-light performance. “Starlight” sensors are engineered to achieve exceptional performance at extremely low lux levels, often utilizing advanced BSI designs and larger pixels.
Image Signal Processor (ISP) and Digital Noise Reduction (DNR)
Once light hits the sensor, the ISP takes over. This dedicated hardware component processes the raw sensor data, performing crucial tasks that affect the final image quality, especially at night.
- Gain Control (AGC): When light is scarce, the ISP amplifies the electrical signal from the sensor. This “gain” brightens the image but also amplifies inherent electronic noise, leading to the characteristic “grainy” appearance. Automatic Gain Control (AGC) attempts to balance brightness and noise, but can often be overly aggressive in very dark scenes.
- Wide Dynamic Range (WDR) / High Dynamic Range (HDR): WDR is vital for scenes with extreme light variations (e.g., a bright streetlight against a dark background).
- True WDR (Optical WDR): Achieved by capturing multiple exposures (e.g., one short, one long) simultaneously or in rapid succession, then combining them into a single, balanced image. This preserves detail in both bright and dark areas without over- or under-exposure.
- Digital WDR (D-WDR): A software-based approach that uses local tone mapping to brighten dark areas and darken bright areas. While helpful, it’s less effective than True WDR and can sometimes introduce artifacts or an artificial look.
- Digital Noise Reduction (DNR):
- 2DNR: Analyzes and filters noise within individual frames. Effective for static noise but can smear details in motion.
- 3DNR: Compares noise patterns across consecutive frames, distinguishing between actual motion and random noise. This is far more effective in low light, reducing graininess significantly while preserving more detail, but can introduce slight motion blur if not finely tuned.
Network and Protocol Impact on Night Vision Quality: The Bitrate Bottleneck Deep Dive
Even with perfect hardware and optimal settings, a poor network connection can cripple your night vision. Compression algorithms, network latency, and bandwidth limitations are often overlooked culprits for grainy, blocky, or choppy nighttime footage.
Video Compression: H.264 vs. H.265 (HEVC)
IP cameras compress video streams to reduce file size and bandwidth requirements. The two dominant codecs are H.264 (AVC) and H.265 (HEVC).
- H.264 (Advanced Video Coding): Widely supported, offers good compression. However, for noisy low-light scenes, it struggles. Noise is essentially random pixel data, which compression algorithms interpret as complex detail, requiring more bits to encode.
- H.265 (High Efficiency Video Coding): Offers significantly better compression efficiency (typically 30-50% better than H.264 for the same quality). This is particularly advantageous for noisy night footage, as it can maintain better quality at lower bitrates, or higher quality at the same bitrate. Ensure your NVR/storage solution supports H.265 if your camera offers it.
Bitrate Management: Video bitrate (Kbps or Mbps) dictates the amount of data transmitted per second. For night vision, where images are inherently noisy and complex for compression, increasing the bitrate is often essential. A common recommendation for 1080p footage at night is at least 4096 Kbps (4 Mbps) for H.264, or 2048 Kbps (2 Mbps) for H.265. For 4K cameras, these figures should be substantially higher – think 10-16 Mbps for H.264 and 5-8 Mbps for H.265.
- CBR vs. VBR:
- Constant Bitrate (CBR): Maintains a consistent bitrate, which is good for predictable network load but can sacrifice quality during complex (noisy) scenes if the bitrate is too low.
- Variable Bitrate (VBR): Adjusts the bitrate dynamically based on scene complexity. This is generally preferred for security cameras, as it allocates more bits to complex, noisy night scenes and fewer to static daytime scenes, optimizing both quality and storage. Set a maximum VBR to prevent network saturation.
- GOP Structure (Group of Pictures): Video streams are composed of I-frames (intra-coded, full image), P-frames (predictive, changes from previous frame), and B-frames (bi-directional predictive). A longer GOP (e.g., 60 frames) means fewer I-frames, which saves bandwidth but makes scrubbing and seeking more difficult, and can degrade quality more severely if an I-frame is corrupted. A shorter GOP (e.g., 15-30 frames) improves responsiveness and resilience but increases bitrate.
Wireless (Wi-Fi) Network Considerations
Wireless networks introduce additional complexities that can impact video quality, especially at night when bitrate demands are higher.
- 2.4GHz: Offers better range and wall penetration but is highly susceptible to interference from other devices (microwaves, Bluetooth Low Energy, Zigbee, Thread, neighboring Wi-Fi networks). Slower theoretical speeds.
- 5GHz: Faster speeds and less interference but shorter range and poorer penetration. Ideal if the camera is close to the access point.
- RSSI (Received Signal Strength Indicator): Aim for an RSSI of -50 dBm or better for reliable streaming. Anything below -70 dBm will likely result in packet loss, retransmissions, and degraded video quality.
- Channel Interference: Use Wi-Fi analysis tools (like NetSpot or inSSIDer) to identify congested channels and select a less utilized one (e.g., channels 1, 6, 11 for 2.4GHz). When selecting 2.4GHz Wi-Fi channels, consider the channels used by co-located Zigbee or Thread networks to minimize interference, as detailed in the IoT Protocols section.
- MCS Index: The Modulation and Coding Scheme index indicates the actual data rate achievable. A low MCS index points to poor signal quality, leading to reduced throughput and potential video stuttering or artifacts.
Wired (Ethernet/PoE) Network Considerations
While generally more reliable, wired connections are not immune to issues.
- Cable Quality: Use Cat5e or Cat6 cables. Poorly terminated or damaged cables can introduce packet errors, leading to retransmissions and degraded video.
- PoE (Power over Ethernet): Ensure your PoE switch or injector provides adequate power. Underpowered cameras can exhibit unstable behavior, including degraded image processing.
- Network Congestion: On busy networks, other traffic (downloads, gaming) can contend for bandwidth. Implement QoS (Quality of Service) on your router to prioritize camera traffic.
IoT Protocols and Local Network Interaction
Many smart cameras utilize various protocols for discovery and communication, even when streaming via RTSP/RTMP/WebRTC.
- mDNS (Multicast DNS) / Bonjour: Used for local device discovery. While not directly affecting video stream quality, issues here can prevent the camera from being discovered or its stream initiated reliably, leading to connectivity issues that appear as “grainy” or absent footage.
- Zigbee/Thread: These 802.15.4-based mesh protocols operate in the 2.4 GHz ISM band, using 16 channels (11-26) with 5 MHz spacing. While not used for primary video streams, they are crucial for many smart home ecosystems. Interference with Wi-Fi is a common issue:
- Wi-Fi Channel 1 (2401–2423 MHz, center 2412 MHz) significantly overlaps Zigbee/Thread channels 11 to 14.
- Wi-Fi Channel 6 (2426–2448 MHz, center 2437 MHz) significantly overlaps Zigbee/Thread channels 16 to 19.
- Wi-Fi Channel 11 (2451–2473 MHz, center 2462 MHz) significantly overlaps Zigbee/Thread channels 21 to 24.
- For optimal coexistence, Zigbee/Thread channels 25 (centered 2475 MHz) and 26 (centered 2480 MHz) are often recommended as they sit entirely outside the primary non-overlapping Wi-Fi channels (1, 6, 11) spectrums, minimizing direct interference.
- Bluetooth Low Energy (BLE): Unlike Classic Bluetooth (BR/EDR) with its 79 channels, BLE uses 40 channels (2 MHz spacing) in the 2.4 GHz ISM band. It employs Adaptive Frequency Hopping (AFH) to dynamically map out congested Wi-Fi channels. Crucially, BLE has 3 dedicated advertising channels (37, 38, 39) strategically located in the spectral gaps between Wi-Fi channels 1, 6, and 11 to minimize interference during device discovery and connection establishment. Ensure BLE networks are stable for auxiliary functions, as issues can impact device pairing and status updates.
ASCII Diagram: Network Flow for an IP Camera Stream
+---------------------+     (1) Local Network Discovery (mDNS/ARP)     +------------------+
| IP Camera (Sensor,  | <------------------------------------------------> | Router/Switch    |
| ISP, Encoder)       |                                                  | (DHCP, DNS, QoS) |
+---------------------+     (2) Power (PoE/DC) & Data (Ethernet/Wi-Fi)   +------------------+
          |                                                                      |
          | (3) Encoded Video Stream (H.264/H.265, RTSP/RTMP/WebRTC)             |
          |                                                                      |
          v                                                                      v
+---------------------+                                            +---------------------+
| Local NVR/NAS       | <------------------------------------------> | Internet Gateway    |
| (Storage, Decode)   |                                            | (WAN Uplink)        |
+---------------------+                                            +---------------------+
          |                                                                      |
          | (4) Local View/Playback                                              |
          v                                                                      v
+---------------------+                                            +---------------------+
| Monitor / Mobile App| <------------------------------------------> | Cloud Server        |
| (Local Access)      |         (5) Remote Access (P2P/Relay)      | (Remote Access, AI) |
+---------------------+                                            +---------------------+
This diagram illustrates the typical data flow for an IP camera, highlighting where network bottlenecks (2, 3, 5) can degrade night vision quality.
Advanced Troubleshooting: A Step-by-Step Guide for Optimal Night Vision
Moving beyond basic settings, this section details a systematic approach to diagnose and resolve grainy night vision, encompassing environmental, hardware, firmware, and network factors.
Phase 1: Environmental & Physical Inspection
- Eliminate IR Reflection Sources:
This is the number one cause of “foggy” or “washed-out” night vision.
- Identify Reflective Surfaces: Walk the camera’s field of view at night with a flashlight. Look for nearby walls, eaves, window frames, rain gutters, glossy paint, or even large signs.
- Reposition Camera: Angle the camera at least 15-20 degrees away from any highly reflective surfaces. If necessary, use a mounting arm to extend the camera further from the wall.
- Trim Foliage: Overhanging branches or dense bushes can reflect IR light, creating dark spots or glare.
- The “Window Problem” (Ring / Nest / Wyze and others): If your camera is pointing out a window, the built-in IR LEDs will inevitably bounce off the glass and blind the sensor. You cannot use internal IR behind glass.
- Open your camera app (e.g., Ring, Nest, Wyze) and navigate to Settings > Night Vision.
- Set Night Vision LEDs or IR Illuminator to OFF.
- Mount a dedicated, external 20 dollar IR Illuminator Outside the window. This provides invisible light that the camera can see, but the glass won’t reflect back into the camera’s lens. Ensure the external illuminator’s wavelength (850nm or 940nm) matches your camera’s sensitivity.
- Clean Lens & Housing:
Dust, dirt, water spots, and especially spider webs can severely degrade night vision.
- Lens Cleaning: Use a microfiber cloth and a lens cleaning solution (or plain water) to gently wipe the lens. Avoid abrasive materials.
- IR LED Cover: Ensure the transparent cover over the IR LEDs is also clean.
- Spider Webs: A single strand of silk can reflect enough IR light to ruin an entire frame, causing a bright, blurry spot. Regularly clear webs from around the camera and its housing. Consider using spider repellent around the camera.
- Assess Ambient Light Sources:
External light sources can both help and hinder night vision.
- Too Much Light: Bright streetlights or porch lights can sometimes cause the camera to stay in “day mode” (with the IR cut filter engaged) or cause overexposure in certain areas, leading to underexposed dark regions.
- Too Little Light: If using “Starlight” or color night vision, ensure sufficient ambient light.
- Solution: Adjust the camera’s IR switching threshold in settings. Many cameras allow you to set the lux level at which the IR cut filter engages/disengages.
Phase 2: In-Camera Firmware Settings & Image Processing
Access your camera’s web interface (if available) or mobile app’s advanced settings. These are often buried in ‘Display’, ‘Image’, ‘Video’, or ‘Advanced’ menus.
- Adjust Gain Control (AGC):
High gain amplifies noise. Lowering it can reduce graininess at the cost of overall brightness.
- Location: Typically under Display > Image > Gain or Exposure > AGC.
- Action: If set to ‘Auto’, try reducing the maximum gain limit. If manual, experiment with lower values. Find a balance where the image is visible but not excessively noisy.
- Enable True WDR (Wide Dynamic Range):
Crucial for balancing extreme light and dark areas in complex night scenes.
- Location: Often under Display > Advanced > WDR/HDR.
- Action: Ensure True WDR (sometimes labeled “Optical WDR” or simply “WDR” without “D”) is enabled. If only D-WDR is available, enable it and adjust its intensity if possible.
- Optimize Digital Noise Reduction (DNR):
DNR is designed to remove grain, but aggressive settings can lead to a “smeary” or “plastic” look, especially with motion.
- Location: Typically under Display > Image > DNR or Noise Reduction.
- Action: If your camera offers 3DNR, enable it. Start with a medium setting. If the image is still too noisy, increase it slightly. If motion appears blurred or details are lost, reduce it.
- Adjust Exposure Settings:
- Shutter Speed: A slower shutter speed allows more light but introduces motion blur. For security, a balance is needed (e.g., 1/30s or 1/15s at night). Faster speeds (e.g., 1/120s) freeze motion but result in darker, noisier images.
- IR Mode Switching Threshold: Many cameras allow you to define the lux level at which the camera switches between day (color) and night (IR/monochrome) modes. Fine-tune this to prevent premature switching or staying in the wrong mode.
Phase 3: Network Diagnostics and Optimization
A pristine image from the sensor can be corrupted if the network path is compromised.
- Increase Video Bitrate:
This is a critical step for noisy night footage.
- Location: Video > Stream Settings > Bitrate or Encoding Settings.
- Action: For 1080p, increase to at least 4096 Kbps (4 Mbps) for H.264 or 2048 Kbps (2 Mbps) for H.265. For 4K, target 10-16 Mbps for H.264 or 5-8 Mbps for H.265. Set the bitrate mode to VBR (Variable Bitrate) With a generous maximum cap.
- Frame Rate (FPS): Ensure your FPS is consistent (e.g., 15-30 FPS). Dropping FPS to save bandwidth can make motion choppy.
- Diagnose Wi-Fi Signal Strength & Interference:
- RSSI Check: Use your camera app (if it displays RSSI) or a dedicated Wi-Fi analyzer app (e.g., NetSpot, Wi-Fi Analyzer) to check the camera’s signal strength. Aim for -50 dBm or better.
- Channel Scan: Identify congested Wi-Fi channels in the 2.4GHz and 5GHz bands. Adjust your router’s channel to a less crowded one.
- Range Extenders/Mesh: If RSSI is poor, consider a Wi-Fi range extender or a mesh Wi-Fi system to improve coverage. Position the extender strategically between the router and the camera.
- Ethernet Backhaul: For critical cameras, prioritize a wired Ethernet connection, even if it requires running new cable or using Powerline adapters.
- Implement Quality of Service (QoS):
- Router Settings: Access your router’s administration page. Look for QoS or “Traffic Prioritization” settings.
- Action: Prioritize your camera’s IP address or MAC address, or prioritize common video streaming ports (e.g., RTSP port 554) to ensure it gets sufficient bandwidth, especially during peak network usage.
IR vs. Color Night Vision: Which is Better?
The choice between traditional infrared and color night vision modes depends heavily on your specific monitoring needs and environmental conditions. Each has distinct advantages and limitations.
| Mode | Technology | Best For | Main Drawback | Typical Lux Requirement |
|---|---|---|---|---|
| Traditional IR (Monochrome) | IR LEDs (850nm/940nm), IR Cut Filter, B&W Sensor Output | Long-range clarity, facial identification, general surveillance in complete darkness. | No color identification (grey scale), susceptible to IR reflection. | 0 lux (complete darkness) |
| Starlight Color Night Vision | Large-aperture lens, highly sensitive large sensor (e.g., 1/1.8″), advanced ISP, sometimes minimal ambient light. | Identifying car color, clothing details, general scene understanding in very low ambient light (e.g., moonlight). | Requires some ambient light to work effectively, often less range than IR in pitch black, can be noisy in near-total darkness. | 0.001 – 0.1 lux |
| Spotlight Color Night Vision | Visible white light LEDs integrated into camera, standard sensor. | Deterrence, high detail color capture in targeted areas, clear identification. | Blinds the intruder (can be good or bad), high power draw, visible light can be intrusive to neighbors. | N/A (camera provides its own illumination) |
| Hybrid (Smart IR/Color) | Combines IR for dark, switches to spotlight or starlight for motion/event. | Optimal balance of covertness and detail when needed, energy efficiency. | Complexity in configuration, potential for delayed color activation. | Variable |
Hardware Limitations & Upgrade Considerations
If, after exhaustive troubleshooting, your camera’s night vision remains unsatisfactory, you may have encountered the inherent limitations of its hardware. No amount of software tweaking can compensate for fundamental sensor deficiencies.
- Sensor Size & Pixel Pitch: As discussed, this is paramount. Cameras advertised with “Starlight” capabilities typically feature larger sensors (e.g., 1/1.8″, 1/2.7″) and larger individual pixels (higher pixel pitch). These larger pixels collect more photons, resulting in a cleaner signal and less need for aggressive gain amplification. Always prioritize sensor size over raw megapixel count for low-light performance. A 2MP camera with a 1/1.8″ sensor will almost always outperform an 8MP (4K) camera with a 1/3″ sensor in the dark.
- Lens Aperture (f-number): The lens’s aperture (f-stop) dictates how much light it can gather. A lower f-number (e.g., f/1.4 or f/1.6) indicates a wider aperture, allowing more light to reach the sensor. Fixed lenses with wide apertures are common in good low-light cameras. Varifocal (zoom) lenses often have variable apertures that may narrow as you zoom in, reducing light intake.
- SoC (System-on-Chip) Processing Power: The camera’s internal processor dictates its ability to run sophisticated image processing algorithms (3DNR, True WDR) in real-time without introducing lag or dropping frames. Budget cameras often use less powerful SoCs, limiting their ability to clean up noisy images effectively.
- Integrated IR Emitters: The quality, quantity, and beam angle of the built-in IR LEDs vary greatly. Higher-end cameras might feature multiple IR LEDs with different angles for more uniform coverage, or more powerful emitters. If your camera has weak integrated IR, an external illuminator is the most cost-effective upgrade.
Frequently Asked Questions (FAQ)
Q1: Why does my camera’s night vision suddenly look worse after a firmware update?
A1: Firmware updates can sometimes reset camera settings to defaults or introduce new, less optimal default parameters for certain environments. Re-check all your advanced image settings (Gain, WDR, DNR, Bitrate) and ensure they align with your preferred configuration. Occasionally, a firmware update might also change the ISP’s processing algorithms, which could subtly alter how noise is handled. If persistent, check manufacturer forums for known issues or consider rolling back to a previous stable firmware if possible and supported.
Q2: Can I use my camera’s built-in IR through double-pane glass?
A2: No, this is generally not feasible. Double-pane glass, like single-pane, will reflect the camera’s internal IR LEDs directly back into the lens, completely washing out the image. The multiple layers of glass and air gaps can even exacerbate the issue. The only viable solution for monitoring through glass at night is to disable the internal IR and use a dedicated external IR illuminator mounted outside the window.
Q3: My camera has “Smart IR.” What does that mean, and can it cause graininess?
A3: “Smart IR” is designed to prevent overexposure of close-up objects by dynamically adjusting the intensity of the IR LEDs. Without Smart IR, a person standing close to the camera might appear as a bright white blob. While beneficial, a poorly implemented Smart IR algorithm could potentially dim the IR LEDs too much, resulting in an underexposed, and thus grainier, image in areas further away or when the primary subject is not directly in the center. Ensure the camera’s firmware is up-to-date, as Smart IR algorithms are often refined.
Q4: Does the camera’s resolution (e.g., 4K vs. 1080p) affect night vision graininess?
A4: Counterintuitively, higher resolution (more megapixels) often correlates with worse night vision in budget cameras. This is because to fit more pixels onto a physically small sensor (common in affordable 4K cameras), each individual pixel must be tiny. Tiny pixels collect less light, leading to a weaker signal and more noise that the ISP has to amplify, resulting in a grainier image. A lower-resolution camera (e.g., 2MP 1080p) with a larger sensor and larger pixels will almost always yield a cleaner, more usable night image than a high-resolution camera with a small sensor.
Q5: How can I tell if my Wi-Fi network is the bottleneck for grainy night vision?
A5: Perform a few diagnostic steps. First, check your camera’s RSSI (Received Signal Strength Indicator) in its settings or via a Wi-Fi analyzer app; aim for -50 dBm or better. Second, try temporarily connecting the camera via Ethernet if possible and compare the night vision quality. If the Ethernet connection significantly improves clarity and reduces blockiness, your Wi-Fi signal or bandwidth is the culprit. Lastly, monitor your router’s network traffic to see if the camera is consistently transmitting its configured bitrate, or if it’s throttling due to network congestion or poor signal.
Conclusion: Mastering the Dark Art of Security Camera Night Vision
Achieving clear, actionable night vision from your security cameras is not a simple plug-and-play endeavor. It demands a holistic understanding of environmental factors, the intricate interplay of hardware components like sensors, lenses, and ISPs, and the often-underestimated impact of network architecture and video compression. From the precise wavelength of an IR illuminator to the individual micron-sized pixels on a sensor, every element contributes to the final image.
The most effective solutions come from systematic troubleshooting, starting with the immediate physical environment, moving through detailed camera settings, and finally scrutinizing the underlying network infrastructure. Don’t be swayed by marketing claims of “4K” if low-light performance is paramount; instead, focus on sensor size, aperture, and advanced image processing capabilities. By meticulously addressing these technical facets, you can transform your grainy, unreliable nighttime footage into sharp, identifiable evidence, ensuring your smart home security system truly sheds light on the dark.
About these guides
These guides are compiled and maintained by the Smart Home Expert editorial desk. Each one is built from manufacturer documentation and the published Zigbee, Z-Wave, Thread and Wi-Fi specifications, then written up as a diagnostic sequence you can follow in order. Found something that does not match your hardware? Tell us and we will correct the sheet.
Specifications and references
The primary documentation for the protocols and products discussed above. Where this guide gives a figure — a frequency, a voltage, a timeout — these are where it comes from.