Robot Vacuum Getting Lost or Losing Its Map
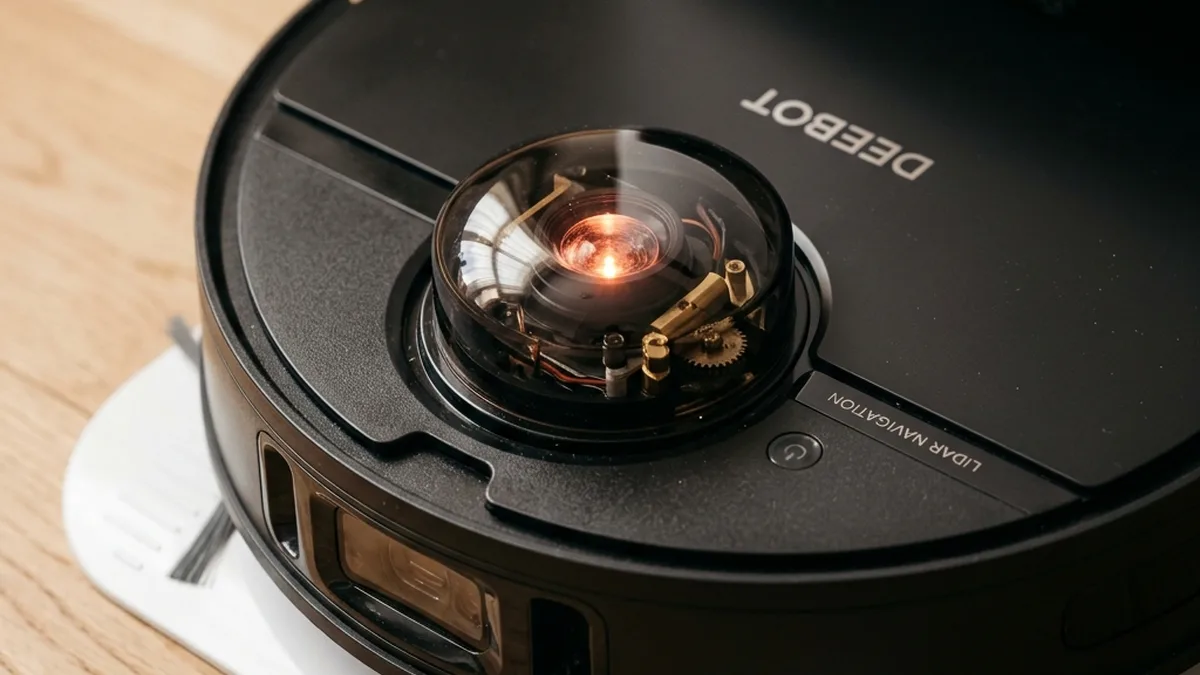
Quick Verdict: Navigation failures in LiDAR-based vacuums are rarely motor failures. Most “Lost” errors are caused by specular reflections From floor-length mirrors or chrome furniture confusing the laser, or accumulated dust on the Cliff Sensors. Cleaning all six sensor arrays and covering mirrors during the first 15 minutes of a map rebuild fixes most mapping loops. For Visual SLAM (VSLAM) systems, insufficient ambient light is the primary culprit. Advanced troubleshooting involves understanding sensor fusion, RF interference, and local network diagnostics.
Lost in Space: How to Fix Robot Vacuum Mapping and Navigation Failures
The modern robot vacuum is a marvel of consumer robotics, integrating sophisticated sensor arrays, real-time Simultaneous Localization and Mapping (SLAM) algorithms, and robust wireless connectivity to autonomously navigate complex environments. However, when these intricate systems encounter anomalies, the result can be frustrating: a vacuum that perpetually “loses its way,” creates corrupted maps, or repeatedly gets stuck. Most navigation issues stem not from mechanical failure, but from environmental interference or misconfigured software parameters that disrupt the delicate balance of sensor data fusion. This guide will delve into the technical underpinnings of robot vacuum navigation and provide a comprehensive, architect-level approach to diagnosing and rectifying common mapping and localization failures.The Foundational Science: LiDAR, VSLAM, and Sensor Fusion
At the core of a robot vacuum’s ability to navigate is its perception system, primarily relying on either LiDAR (Light Detection and Ranging) or VSLAM (Visual Simultaneous Localization and Mapping), often augmented by other sensors.LiDAR Systems: The Precision of Pulsed Light
Most high-end robot vacuums, such as those from Roborock, Dreame, and newer Xiaomi models, employ LiDAR technology. A typical LiDAR module consists of a rapidly spinning turret (often 300-600 RPM) housing a laser diode and a photodiode receiver. The laser diode emits thousands of pulsed infrared (IR) light beams per second. When these pulses strike an object, they reflect back to the photodiode. The system then calculates the Time-of-Flight (ToF) for each pulse – the duration between emission and reception – to determine the precise distance to the object. This process generates a dense 2D point cloud representing the immediate surroundings. As the turret spins, a complete 360-degree scan builds a detailed spatial map. The accuracy of this distance measurement is typically within a few millimeters, providing the raw data for sophisticated SLAM algorithms. Challenges with LiDAR:- Specular Reflection: Highly reflective surfaces, such as floor-length mirrors, polished chrome furniture, or even large glass panes, cause the laser pulse to bounce off at an angle, creating a “phantom” reflection that the vacuum interprets as a solid object or an extension of the room. This leads to distorted maps, phantom walls, or the vacuum attempting to navigate into non-existent spaces.
- Absorption: Dark, non-reflective surfaces (e.g., velvet, deep pile carpets) can absorb IR light, causing weak or no return signals. This results in “blind spots” or perceived voids in the map.
- Transparency: Clear glass or plexiglass can be LiDAR-transparent, meaning the laser passes through largely unimpeded. The vacuum might “see through” these barriers, leading to collisions or attempts to traverse impassable areas.
- Environmental Obstruction: Dust, hair, or debris accumulating on the LiDAR sensor’s optical window can scatter or block laser pulses, reducing measurement accuracy and range.
VSLAM Systems: Visualizing the Environment
iRobot’s Roomba j/s series and some older Ecovacs models predominantly use VSLAM. Instead of lasers, these systems employ an upward-facing wide-angle camera to capture continuous video frames of the ceiling and upper walls. VSLAM algorithms identify unique, static visual features (e.g., corners, patterns, light fixtures) in these frames. By tracking the apparent movement of these features across successive frames, the vacuum can estimate its own change in position and orientation (visual odometry). Simultaneously, it builds a sparse map of these features, allowing it to localize itself within that map. Challenges with VSLAM:- Lighting Dependence: VSLAM is critically dependent on consistent and adequate ambient light. In dim or dark environments, the camera cannot reliably extract sufficient visual features, leading to localization failure and “lost” errors.
- Feature Scarcity: Environments with uniform textures (e.g., plain white ceilings, long hallways with no distinct features) can challenge VSLAM, as there are fewer unique points to track.
- Dynamic Environments: Significant changes in the environment (e.g., moving furniture, open/closed doors) can confuse the system, leading to map corruption or re-localization issues.
- Privacy Concerns: While most VSLAM systems process imagery locally and only transmit abstract map data, the presence of a camera in a private space raises privacy considerations for some users.
Sensor Fusion: The Brain of Navigation
No single sensor provides a complete picture. Modern robot vacuums employ sensor fusion – combining data from multiple sensor types – to achieve robust and accurate navigation. This typically involves:- IMU (Inertial Measurement Unit): Comprising accelerometers and gyroscopes, the IMU provides data on the vacuum’s linear acceleration and angular velocity. This is crucial for dead reckoning (estimating position based on previous position, speed, and direction) and for compensating for wheel slip. Magnetometers might also be included for absolute orientation.
- Wheel Encoders: Optical or magnetic encoders on the drive wheels measure the rotation of each wheel, providing precise odometry data for distance traveled.
- Cliff Sensors: Usually a set of IR emitter/receiver pairs located on the underside. They detect sudden drops (e.g., stairs) by measuring the reflection of IR light from the floor. Lack of reflection indicates a drop-off.
- Bumper/Proximity Sensors: Mechanical bumper switches and/or front-facing IR proximity sensors detect direct collisions or close proximity to obstacles, triggering avoidance maneuvers.
- Wall Sensors: A side-mounted IR sensor (common in Roborock) helps the vacuum maintain a precise distance from walls during edge cleaning, crucial for accurate map boundary definition.
Robot Vacuum Sensor Data Flow & SLAM Integration
+-------------------+       +-------------------+       +-------------------+
|     LiDAR/VSLAM   |       |        IMU        |       |  Wheel Encoders   |
| (Global Position) |       |  (Orientation/Acc)|       |  (Odometry/Dist)  |
+---------+---------+       +---------+---------+       +---------+---------+
          |                             |                             |
          v                             v                             v
+--------------------------------------------------------------------------+
|                       SENSOR FUSION ENGINE (SLAM)                        |
|   (Extended Kalman Filter, Particle Filter, Graph SLAM, etc.)            |
|   - Estimates current pose (X, Y, θ) and builds/updates map.      |
+--------------------------------------------------------------------------+
          |
          v
+-------------------+       +-------------------+       +-------------------+
|   Map Management  |       |  Path Planning    |       |  Obstacle Avoid.  |
| (Map Storage/Edit)|       |  (A, RRT, DLite)|       | (Bumper/Cliff/IR) |
+---------+---------+       +---------+---------+       +---------+---------+
          |                             |                             |
          v                             v                             v
+--------------------------------------------------------------------------+
|                    MOTOR CONTROL & ACTUATION SYSTEM                      |
|                     (Driving Wheels, Brush Motors)                       |
+--------------------------------------------------------------------------+
Network & Connectivity: The IoT Backbone
Beyond its internal sensors, a robot vacuum is an IoT device, relying on wireless connectivity for app control, firmware updates, and often cloud-based map storage and processing.Wi-Fi (IEEE 802.11 b/g/n/ac)
Most robot vacuums connect to the home Wi-Fi network, primarily utilizing the 2.4 GHz band (802.11b/g/n) due to its superior range and penetration through walls compared to 5 GHz. Some newer high-end models support 5 GHz (802.11ac) For faster data transfer, especially useful for transmitting high-resolution map data or video streams (if equipped). Common Wi-Fi-Related Issues:-
2.4 GHz Congestion & Coexistence: The 2.4 GHz ISM band is a shared spectrum, often crowded with various wireless technologies including Wi-Fi, Bluetooth, Zigbee, Thread, microwaves, and cordless phones. This congestion is a primary source of interference.
-
Wi-Fi Channel Overlaps: Standard 20 MHz wide Wi-Fi channels (e.g., 1, 6, 11) occupy significant portions of the spectrum.
- Wi-Fi Channel 1 (center 2412 MHz, occupies 2401-2423 MHz) directly overlaps with Zigbee/Thread channels 11 through 14.
- Wi-Fi Channel 6 (center 2437 MHz, occupies 2426-2448 MHz) directly overlaps with Zigbee/Thread channels 16 through 19.
- Wi-Fi Channel 11 (center 2462 MHz, occupies 2451-2473 MHz) directly overlaps with Zigbee/Thread channels 21 through 24.
- Mitigation: To minimize interference for 802.15.4-based devices (Zigbee/Thread), it is highly recommended to configure your Wi-Fi router to use only the non-overlapping channels 1, 6, or 11. For Zigbee/Thread networks, channels 25 (center 2475 MHz) and 26 (center 2480 MHz) Are widely considered the safest fallback options as they sit entirely outside the primary Wi-Fi channels 1, 6, and 11 spectrums, offering the best chance for clear communication. Interference can lead to dropped connections, slow data transfer, and delayed commands, potentially affecting real-time map updates or localization if the vacuum relies on cloud services for map processing.
-
Wi-Fi Channel Overlaps: Standard 20 MHz wide Wi-Fi channels (e.g., 1, 6, 11) occupy significant portions of the spectrum.
- Router Band Steering/AP Isolation: Some modern routers employ “band steering” to automatically push devices to the 5 GHz band. If the vacuum only supports 2.4 GHz, this can cause connection issues. AP Isolation (or Client Isolation) is a security feature that prevents connected devices from communicating with each other. While good for guest networks, it can hinder local device discovery (e.g., mDNS/Bonjour) or direct local control features that some vacuums offer. Ensure it’s disabled for your primary IoT SSID.
- Firewall Rules & VLANs: For advanced users segmenting their IoT devices onto a separate VLAN, ensure that necessary ports (e.g., MQTT on 1883/8883, HTTP/HTTPS on 80/443 for firmware updates, mDNS on 5353/UDP) are open between the IoT VLAN and the main network/internet as required by the vacuum’s specific cloud architecture.
- SSID Name/Password: Special characters in SSID or Wi-Fi passwords can sometimes cause issues with embedded Wi-Fi modules that have less robust parsing capabilities. Stick to alphanumeric characters.
Bluetooth Low Energy (BLE – Bluetooth 4.0+)
BLE is commonly used for the initial setup process. When you first unbox a vacuum, your smartphone connects directly to the vacuum via BLE to transfer Wi-Fi credentials securely. Unlike Classic Bluetooth (BR/EDR) which uses 79 channels, BLE operates on 40 channels, each 2 MHz wide, within the 2.4 GHz ISM band. Critically, BLE employs Adaptive Frequency Hopping (AFH) to dynamically map out and avoid congested Wi-Fi channels, enhancing coexistence. It also reserves three dedicated advertising channels (channels 37, 38, and 39) strategically placed in the spectral gaps between the primary non-overlapping Wi-Fi channels (1, 6, and 11) to minimize interference during device discovery and connection establishment. Once connected to Wi-Fi, BLE typically becomes inactive or is used only for very short-range, local diagnostics and control.Proprietary RF
While less common now, some older or entry-level models might use proprietary RF protocols (e.g., 433 MHz, 915 MHz) for simple remote controls or communication with charging docks. These are generally robust but offer limited functionality.Firmware and Software: The Algorithmic Core
The vacuum’s firmware is the operating system that orchestrates all hardware functions, runs the SLAM algorithms, manages sensor data, and handles network communication.- Algorithm Drift: Over time, especially in highly dynamic environments, the SLAM algorithm can accumulate error, leading to map “drift” where the vacuum’s perceived position no longer aligns with its actual physical location. This is often exacerbated by inconsistent sensor readings.
- Map Corruption: A sudden environmental change (e.g., moving a large piece of furniture mid-clean, strong interference) or a firmware glitch can corrupt the stored map data, leading to illogical paths, missed areas, or the vacuum getting stuck in previously clear zones.
- OTA (Over-the-Air) Updates: Firmware updates are crucial for bug fixes, performance improvements, and new features. However, a failed or interrupted OTA update can brick the device or introduce new bugs. Always ensure a stable Wi-Fi connection and sufficient battery charge during updates.
- App Synchronization: The mobile app serves as the user interface, displaying maps, scheduling, and settings. Discrepancies between the app’s cached map data and the vacuum’s internal map can cause confusion.
Hyper-Specific Brand Fixes and Advanced Troubleshooting
Let’s expand on brand-specific nuances and general advanced troubleshooting techniques.Roborock (S7/S8 Series, Q Revo)
Roborock’s LiDAR systems are highly refined, but specific issues persist:- Wall Sensor Calibration: The small rectangular IR sensor on the side (often near the right drive wheel) is critical for “wall following” and maintaining map orientation. If it’s dirty or malfunctioning, the vacuum might “crab walk” or create maps that are consistently tilted or misaligned. Action: Clean this sensor meticulously with a dry microfiber cloth or a Q-tip. In the app, try toggling “Map Saving Mode” off and on, or perform a “Map Restore” if a clean previous version exists.
- LiDAR Turret Obstruction: While rare, hair or fine debris can get lodged under the LiDAR turret, impeding its free rotation. This will manifest as the turret not spinning or making grinding noises. Action: Gently attempt to rotate the turret by hand to feel for resistance. If obstructed, use compressed air or fine tweezers (carefully!) to clear debris. Do NOT force rotation.
- Multi-Floor Mapping: Roborock supports multiple maps. Ensure you are loading the correct map for the floor the vacuum is currently on. If it’s on a different floor than the loaded map, it will often attempt to re-localize and fail, potentially creating a new, corrupted map.
Roomba (iRobot j/s Series, Combo models)
Roomba’s VSLAM systems have their own sensitivities:- Ambient Lighting: The absolute most common cause of “Incomplete Map” or “Lost” errors for VSLAM Roombas is insufficient lighting. Action: Ensure the cleaning area is well-lit, particularly the ceiling and upper walls, which the camera uses for feature tracking. If cleaning at night, turn on overhead lights. For persistent dark spots, consider adding a smart light that activates during cleaning.
- Feature-Poor Environments: Areas with very high, uniform ceilings or minimal visual clutter can confuse VSLAM. Action: Introduce some visual landmarks if possible (e.g., a patterned rug, a unique piece of furniture).
- Camera Lens Cleanliness: Just like any camera, a dirty lens (dust, fingerprints, pet nose prints) will impair its ability to capture clear visual features. Action: Gently wipe the camera lens on top with a dry, soft microfiber cloth.
- Keep Out Zones vs. Invisible Walls: Roomba allows for software “Keep Out Zones.” If these are incorrectly placed or too restrictive, the vacuum might continuously re-attempt to enter them, leading to localization failures. Review and adjust these virtual boundaries.
Dreame & Xiaomi (Lidar-based models)
These brands share similar LiDAR technology with Roborock, so many of the LiDAR-specific solutions apply.- Docking Station Placement: Ensure the docking station is placed in an area with good Wi-Fi signal and clear surroundings (at least 0.5m on sides, 1.5m in front). If the vacuum struggles to find its dock, it can impact its ability to localize itself upon return, or even cause map corruption if it “drifts” while searching.
- Firmware Consistency: These brands often release firmware updates. Check for the latest version and ensure your vacuum is updated. Sometimes, a specific firmware version might have a bug that causes navigation issues, which is then patched in a subsequent release.
Comprehensive Troubleshooting Flow: From Environment to Firmware
This detailed, step-by-step guide is designed to systematically diagnose and resolve robot vacuum navigation issues.Phase 1: Environmental & Physical Inspection
-
Inspect LiDAR Turret (for LiDAR models):
- Action: Gently push down on the LiDAR turret. It should spring back easily. Try rotating it manually; it should spin freely without resistance or grinding noises.
- Diagnosis: If stiff or noisy, debris (hair, lint) might be trapped underneath. Use compressed air or fine tweezers to clear. If still stuck, mechanical failure of the motor or bearing is possible, requiring professional service.
-
Clean ALL External Sensors:
-
Action: Use a dry, clean microfiber cloth or a Q-tip.
- LiDAR Window: Wipe the transparent window on the turret.
- Cliff Sensors: Usually 4-6 small IR windows on the underside. Be thorough, as dust here is a major culprit.
- Wall Sensor: The side-mounted IR sensor (especially on Roborock).
- Bumper Sensors: Clear any debris from the mechanical bumper’s movement range.
- VSLAM Camera Lens: Gently wipe the camera lens on top (for VSLAM models).
- Diagnosis: Accumulated dust or smudges significantly degrade sensor performance, leading to misreadings.
-
Action: Use a dry, clean microfiber cloth or a Q-tip.
-
Identify and Mitigate Reflective Surfaces (for LiDAR models):
- Action: During the initial mapping run (or a map rebuild), temporarily cover floor-length mirrors, highly polished chrome furniture, or large glass panes with opaque materials (e.g., cardboard, towels, painter’s tape). Once the perimeter is established, you can remove the barriers.
- Diagnosis: These surfaces cause specular reflections, creating “phantom walls” or distorted map geometry.
-
Ensure Adequate Lighting (for VSLAM models):
- Action: If your vacuum uses VSLAM, ensure the cleaning area, particularly the ceiling, is well-lit. Consider scheduling cleaning during daylight hours or turning on overhead lights.
- Diagnosis: VSLAM relies on visual feature extraction; low light prevents this, leading to localization failures.
-
Clear Environmental Obstructions:
- Action: Remove loose cables, small rugs that can snag, pet waste, and clutter from the floor. Ensure furniture is in its usual position.
- Diagnosis: Physical obstructions can cause the vacuum to get stuck, disorient it, or even damage sensors if it repeatedly collides.
Phase 2: Software & Network Diagnostics
-
Soft Reset/Reboot the Vacuum:
- Action: Turn the vacuum off and then back on. For many models, holding the power button for 3-5 seconds performs a soft reset. Refer to your manual for specific instructions.
- Diagnosis: A simple reboot can clear temporary software glitches or memory issues.
-
Check Wi-Fi Connectivity & Signal Strength:
- Action: Open your vacuum’s app and check its connection status. If available, look for Wi-Fi signal strength indicators. Use a Wi-Fi analyzer app on your phone to check the signal strength (RSSI) near the vacuum’s charging dock and in areas where it frequently gets “lost.” Aim for RSSI values stronger than -65 dBm.
- Diagnosis: Weak Wi-Fi can lead to delayed commands, failed firmware updates, or issues if the vacuum relies on cloud processing for map data.
-
Verify Router Settings:
-
Action: Log into your router’s administration interface.
- 2.4 GHz Band: Ensure it’s enabled.
- AP Isolation/Client Isolation: Confirm this feature is DISABLED for your main Wi-Fi network.
- Band Steering: If enabled, temporarily disable it or create a dedicated 2.4 GHz SSID for your IoT devices.
- DFS Channels: If using 5 GHz, avoid Dynamic Frequency Selection (DFS) channels if possible, as they can be temporarily unavailable.
- Diagnosis: Incorrect router settings are a common cause of intermittent connectivity or setup failures for IoT devices.
-
Action: Log into your router’s administration interface.
-
Update Firmware:
- Action: Check the vacuum’s companion app for any pending firmware updates. Install them ensuring the vacuum is on its charging dock and has sufficient battery.
- Diagnosis: Firmware updates often contain critical bug fixes for navigation, sensor interpretation, and SLAM algorithms.
Phase 3: Map Management & Rebuilding
-
Delete Existing Map(s):
- Action: This is a crucial step. In your vacuum’s app, navigate to the map management section and delete the existing floor map entirely. Do NOT just try to edit a corrupted map.
- Diagnosis: A fundamentally corrupted map is often irrecoverable through editing and will continually cause localization failures. Starting fresh is usually the most effective solution.
-
Perform a Dedicated Mapping Run:
-
Action: After deleting the map, initiate a “Mapping Run” or “Quick Map” (if available) from the app.
- Preparation: Before starting, perform Phase 1 actions, especially covering mirrors for LiDAR vacuums and ensuring good lighting for VSLAM vacuums.
- Supervision: Ideally, supervise the vacuum during this initial mapping phase. Ensure it covers the entire perimeter of the floor without getting stuck or confused.
- Environment: Keep the environment as static as possible during the mapping run. Avoid moving furniture or opening/closing doors that were previously closed.
- Diagnosis: A clean, accurate initial map is paramount for consistent future navigation. This step forces the vacuum to re-learn its environment from scratch, eliminating accumulated errors.
-
Action: After deleting the map, initiate a “Mapping Run” or “Quick Map” (if available) from the app.
-
Test and Refine:
- Action: After the new map is generated, run a few cleaning cycles. Observe its behavior. If issues persist, consider adding virtual no-go zones or invisible walls in problem areas within the app.
- Diagnosis: Fine-tuning the map with virtual barriers can mitigate persistent environmental challenges that cannot be physically removed (e.g., complex furniture arrangements, specific reflective spots).
Common Robot Vacuum Error Messages & Initial Troubleshooting Steps
| Error Message / Symptom | Primary Cause(s) | Initial Troubleshooting Step |
|---|---|---|
| “Lost in Space” / “Localization Failed” | Corrupted map, environmental changes, sensor confusion (specular reflection/low light). | Clean all sensors (LiDAR, VSLAM camera, cliff). Perform a map rebuild after deleting the old map. Ensure adequate lighting (VSLAM) or cover mirrors (LiDAR). |
| “LiDAR Blocked” / Turret Not Spinning | Debris (hair, dust) obstructing the LiDAR turret’s movement or optical window; motor failure. | Gently clean the LiDAR window. Check if the turret spins freely; carefully clear any visible debris from under the turret with compressed air or tweezers. |
| “Cliff Sensor Error” / Avoiding Dark Carpets | Accumulated dust on cliff sensors; dark/black surfaces absorbing IR light. | Thoroughly clean all cliff sensors on the underside. For persistent issues with dark carpets, use virtual no-go zones. |
| “Bumper Stuck” / Repeated Collisions | Debris caught behind the bumper; mechanical bumper switch failure. | Gently press the bumper around its perimeter to ensure free movement. Clear any visible debris. |
| “No Wi-Fi Connection” / App Not Responding | Weak Wi-Fi signal, incorrect router settings (AP isolation, band steering), 2.4 GHz congestion. | Reboot router and vacuum. Check Wi-Fi signal strength near dock. Verify router settings: Disable AP isolation/band steering, ensure 2.4 GHz is active. |
| Vacuum “Drifts” / Map Becomes Tilted | Accumulated odometry/IMU error; dirty wall sensor; LiDAR misalignment. | Clean all sensors, especially the side wall sensor. Consider a map rebuild. Minimize environmental changes during cleaning. |
Sensor Type Comparison & Common Failure Modes
| Sensor Type | Principle of Operation | Key Strengths | Common Failure Modes / Weaknesses |
|---|---|---|---|
| LiDAR (ToF) | Measures Time-of-Flight of laser pulses. | High accuracy, works in darkness, fast 2D mapping. | Specular reflection (mirrors/glass), dark surface absorption, mechanical motor failure, optical obstruction. |
| VSLAM (Camera) | Tracks visual features in camera frames. | Rich environmental context, potentially lower cost. | Requires adequate light, sensitive to feature-poor areas, camera lens obstruction, privacy concerns. |
| Cliff Sensors (IR) | IR emitter/receiver detects floor presence. | Reliable drop-off detection. | Dust/dirt accumulation, dark carpets absorbing IR, bright ambient light interference. |
| IMU (Accel/Gyro) | Measures acceleration and angular velocity. | High-frequency motion tracking, dead reckoning. | Accumulative drift over time, sensitive to vibrations/jolts. |
| Wheel Encoders | Measures wheel rotations. | Precise odometry for short distances. | Wheel slip on certain surfaces, hair/debris jamming. |
| Wall/Proximity (IR/Mech) | IR range finding or mechanical bumper switches. | Close-range obstacle detection, wall following. | Optical obstruction, mechanical switch failure, sensitivity to dark surfaces. |
Frequently Asked Questions (FAQ)
Q: My vacuum always gets stuck in the same spot, even after a map rebuild. What gives?
A: This often indicates a persistent environmental challenge that the vacuum’s sensors struggle with.- For LiDAR: It could be a specific reflective surface creating a phantom obstacle, or a very narrow gap that the vacuum attempts to enter but cannot exit.
- For VSLAM: It might be a low-light area, or a spot with very few distinct visual features.
Q: Can I use my robot vacuum on multiple floors? Do I need multiple maps?
A: Yes, most advanced robot vacuums support multiple maps for different floors. Procedure:- Carry the vacuum to the new floor (without its charging dock).
- Initiate a “New Map” or “Mapping Run” from the app.
- Once the new map is created, save it.
- When cleaning a specific floor, ensure you manually select the correct map in the app before starting the cleaning cycle.
Q: My vacuum keeps reporting “Error 1: LiDAR blocked” or similar, but I’ve cleaned it.
A: If the LiDAR window is clean, the issue might be internal:- Internal Debris: Fine dust or hair might have penetrated the turret housing, obstructing the laser path or the motor.
- LiDAR Motor Failure: The small motor responsible for spinning the turret might be failing. Listen for any unusual sounds (grinding, squealing, or complete silence when it should be spinning).
Q: My Roomba keeps getting stuck on dark carpets or black transitions. Why?
A: This is a classic “cliff sensor” issue. Dark colors, especially black, absorb the infrared light emitted by the cliff sensors. The sensors interpret this lack of reflection as a drop-off (like stairs) and trigger the vacuum to back away, preventing it from traversing the dark surface. Solution:- Clean Cliff Sensors: Thoroughly clean the cliff sensors on the underside.
- Temporary Fix: For very specific, problematic areas, some users apply opaque tape (e.g., electrical tape) over the cliff sensors. WARNING: This disables the cliff detection, making the vacuum vulnerable to falling down stairs. Use with extreme caution and only if you can guarantee there are no drop-offs in the cleaning path.
- Virtual Barriers: The safest solution is to use the app to create a “No-Go Zone” or “Invisible Wall” around the problematic carpet or transition.
Q: My vacuum seems to drift or get confused after a long cleaning cycle.
A: This is often a sign of accumulated odometry error or IMU drift, especially in complex environments. Technical Explanation: While LiDAR/VSLAM provides global localization, IMU and wheel encoders provide high-frequency relative positioning. Over extended periods, small errors in these relative measurements can accumulate (“drift”). The SLAM algorithm attempts to correct this by periodically re-localizing against the global map provided by LiDAR/VSLAM. If the environment is ambiguous or sensors are intermittently unreliable, the corrections might not be perfect, leading to visible drift. Solution:- Ensure all sensors are impeccably clean.
- Reduce environmental complexity: Minimize movable obstacles.
- Consider a map rebuild if the drift becomes persistent.
- Check for Wi-Fi interference: If your vacuum uses cloud processing for map updates, poor Wi-Fi can delay corrections.
Conclusion: Mastering Your Autonomous Cleaner
Robot vacuum navigation, while seemingly magical, is a complex interplay of optics, mechanics, embedded software, and network communication. Understanding the underlying principles of LiDAR, VSLAM, sensor fusion, and their environmental sensitivities is key to effectively troubleshooting persistent mapping and localization failures. Most issues can be resolved through diligent sensor cleaning, strategic environmental mitigation (especially for reflective surfaces or low light), and systematic map management within the companion app. By adopting a methodical approach, from physical inspection to network diagnostics and firmware checks, you can restore your robot vacuum to its optimal cleaning performance, ensuring it remains a smart, rather than a lost, addition to your home.About these guides
These guides are compiled and maintained by the Smart Home Expert editorial desk. Each one is built from manufacturer documentation and the published Zigbee, Z-Wave, Thread and Wi-Fi specifications, then written up as a diagnostic sequence you can follow in order. Found something that does not match your hardware? Tell us and we will correct the sheet.
Specifications and references
The primary documentation for the protocols and products discussed above. Where this guide gives a figure — a frequency, a voltage, a timeout — these are where it comes from.
Same net
APP
066
APP-1844