Smart Hub Stuck Mid Firmware Update? How to Recover It
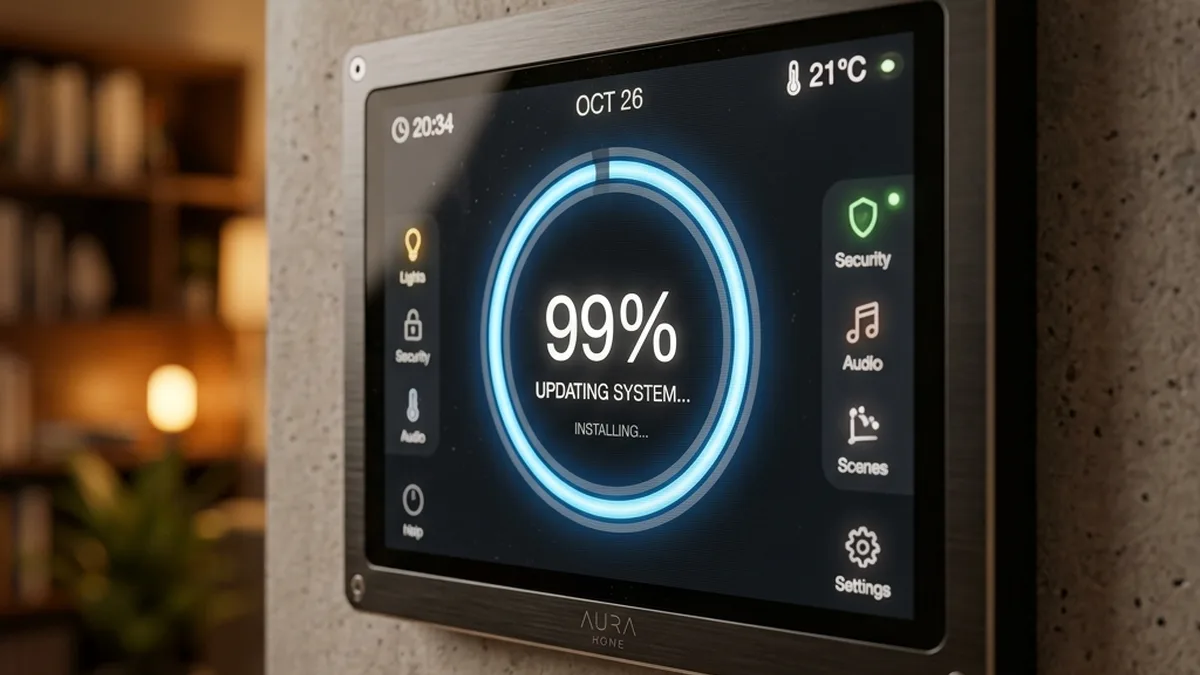
Firmware updates are critical for security, feature enhancements, and bug fixes in smart home ecosystems. However, they represent a moment of vulnerability for any embedded system. A stalled or failed firmware update can render a smart hub unresponsive, seemingly “bricked,” and disrupt an entire smart home. This comprehensive guide, informed by deep technical experience in IoT systems architecture, delves into the intricate causes of update failures and provides highly technical, actionable strategies to rescue your smart hub from the dreaded infinite loop.
The root causes of firmware failures are multifaceted, frequently stemming from micro-interruptions or data corruption at various layers of the network stack and within the device’s flash memory. For instance, updating a Samsung SmartThings or Hubitat Elevation Hub over an unstable 2.4GHz Wi-Fi connection introduces significant risk due to potential RF interference, channel congestion, and packet loss. A temporary, direct Ethernet tether is unequivocally recommended for any critical system-level flash operation to ensure data integrity and minimize transmission errors.
A/B Partitioning Rollback Flow
Modern smart hubs often employ dual A/B partitioning, where firmware updates are written to an inactive partition. If the update fails, the bootloader can revert to the last stable partition, preventing permanent bricking.
Deep Dive: Technical Analysis of Firmware Update Failures
To effectively troubleshoot a stalled firmware update, it’s crucial to understand the underlying technical mechanisms that can lead to failure. This involves examining issues across the network stack, RF environment, and the hardware/firmware interface.
1. Network Layer (OSI Layers 3 & 4) Anomalies
The journey of a firmware file from the manufacturer’s server to your smart hub involves multiple network hops and protocols. Failures here are common:
- DHCP/IP Configuration Instability: Smart hubs typically acquire an IP address via DHCP. If the hub reboots during an update and receives a different IP, or if the DHCP server (your router) experiences a momentary service interruption, the hub may lose its network identity mid-transfer. DHCP reservations, which assign a static IP to a device’s MAC address, are a critical preventative measure.
- DNS Resolution Failures: The hub needs to resolve the firmware server’s domain name (e.g.,
update.hubitat.com) to an IP address. If your router’s DNS settings are misconfigured, or if the upstream DNS server is temporarily unreachable, the hub cannot initiate the download. - Firewall & Intrusion Prevention Systems (IPS/IDS): Many consumer routers (e.g., Netgear Armor, ASUS AiProtection, Linksys Shield) incorporate advanced security features. High-volume data bursts characteristic of firmware downloads can sometimes be misidentified as suspicious activity (e.g., a Denial-of-Service attempt) and blocked. Deep Packet Inspection (DPI) features can also interfere with encrypted firmware streams.
- TCP/UDP Handshake Interruptions: Firmware downloads predominantly use TCP for reliable data transfer. A TCP session involves a three-way handshake and continuous acknowledgment of packets. Any dropped packets, retransmission timeouts, or incomplete handshakes due to network congestion or Wi-Fi instability can corrupt the downloaded firmware image. UDP-based discovery protocols (like mDNS/Bonjour) can also be affected, making local hub discovery difficult.
2. RF Layer (OSI Layers 1 & 2) Interference and Integrity
Wireless communication, while convenient, is inherently less reliable for critical data transfers compared to wired connections, especially in the crowded 2.4GHz band.
- Wi-Fi (2.4GHz/5GHz) Instability:
- Channel Congestion: The 2.4GHz band, utilized by many smart hubs, is highly susceptible to interference from neighboring Wi-Fi networks, Bluetooth devices, microwave ovens, cordless phones, and even baby monitors. Overlapping channels (1, 6, 11 are non-overlapping for Wi-Fi itself) lead to increased retransmissions and packet loss.
- Signal-to-Noise Ratio (SNR): A low SNR, often resulting from weak Wi-Fi signal strength (high negative RSSI values) or high environmental noise, directly impacts data integrity. The hub’s Wi-Fi module might struggle to decode packets accurately, leading to corrupted segments of the firmware image.
- Hidden Node Problem: In environments with multiple Wi-Fi devices, a “hidden node” (a device that can hear the Access Point but not another client) can cause collisions and data corruption, particularly during sustained high-bandwidth transfers like firmware updates.
- Zigbee, Z-Wave, Thread, and Bluetooth LE (BLE) Coexistence: While these protocols typically operate on different frequencies or utilize different channels, they can still experience interference.
- Zigbee/Thread (IEEE 802.15.4): These protocols operate in the 2.4GHz ISM band using 5 MHz wide channels. Wi-Fi channels (20 MHz wide) significantly overlap with Zigbee/Thread channels. Specifically:
- Wi-Fi Channel 1 (center 2412 MHz, 2401-2423 MHz) overlaps Zigbee/Thread channels 11 (2405 MHz) to 14 (2420 MHz).
- Wi-Fi Channel 6 (center 2437 MHz, 2426-2448 MHz) overlaps Zigbee/Thread channels 16 (2430 MHz) to 19 (2445 MHz).
- Wi-Fi Channel 11 (center 2462 MHz, 2451-2473 MHz) overlaps Zigbee/Thread channels 21 (2455 MHz) to 24 (2470 MHz).
- Poor channel planning (e.g., using Zigbee channel 15 or 20, which are close to Wi-Fi 1/6 and 6/11 respectively) can lead to significant performance degradation for both. Zigbee/Thread channels 25 (2475 MHz) and 26 (2480 MHz) are generally considered the safest as they sit largely outside the primary Wi-Fi 1, 6, and 11 spectrums.
- Bluetooth Low Energy (BLE): Smart home devices primarily use BLE, which operates on 40 channels (2 MHz apart) in the 2.4GHz ISM band, unlike Classic Bluetooth’s 79 channels. BLE employs Adaptive Frequency Hopping (AFH) to dynamically avoid congested Wi-Fi channels. Crucially, BLE’s three dedicated advertising channels (37, 38, 39) are strategically placed in the spectral gaps between Wi-Fi channels 1, 6, and 11 to minimize interference during device discovery and connection establishment.
- Z-Wave: Operates in sub-1 GHz bands, typically 868.4 MHz (Europe) or 908.4 MHz (North America), making it immune to 2.4GHz Wi-Fi/Zigbee interference.
A hub’s internal radio modules might also experience issues if the main CPU is under heavy load or memory corruption occurs during a flash. A failed firmware update can sometimes corrupt the radio’s network keys or firmware, requiring a re-pairing of all connected devices.
- Zigbee/Thread (IEEE 802.15.4): These protocols operate in the 2.4GHz ISM band using 5 MHz wide channels. Wi-Fi channels (20 MHz wide) significantly overlap with Zigbee/Thread channels. Specifically:
3. Hardware & Firmware Layer Integrity
Even with a perfect network connection, issues within the hub’s internal hardware or firmware architecture can cause update failures.
- Flash Memory Corruption: Firmware is stored on non-volatile flash memory (e.g., NAND or NOR flash). Flash memory has a finite number of write cycles. A sudden power loss during a critical write operation can corrupt specific memory blocks, rendering them unreadable or unwritable. This can lead to a partial or malformed firmware image.
- Bootloader Integrity: The bootloader is a small, critical piece of software that initializes the hardware and loads the main operating system (firmware). If the bootloader itself becomes corrupted (a rare but severe event), the device may fail to even start the boot process, leading to a “hard brick.” Modern hubs use bootloader protection mechanisms and often reside in a separate, write-protected memory region.
- Checksum and CRC Errors: Firmware files include checksums (e.g., MD5, SHA-256) or Cyclic Redundancy Check (CRC) values. After downloading, the hub calculates the checksum of the received file and compares it to the expected value embedded in the file or provided by the server. A mismatch indicates data corruption during transfer or storage, leading the hub to reject the update.
- Watchdog Timers: Embedded systems often include hardware watchdog timers. If the main CPU hangs or enters an infinite loop, the watchdog timer will reset the system after a predefined period. While designed for recovery, a poorly implemented watchdog can prematurely reset the system during a legitimate, long-running firmware write operation, leading to corruption.
- Insufficient System Resources: In rare cases, a hub might lack sufficient free RAM or temporary storage space to unpack and install a new firmware image, especially if it’s a large update or the hub’s storage is fragmented.
Recovery Protocols: Exact Rescue Paths & Advanced Diagnostics
The method to break an update loop depends fundamentally on the hub’s operating system, its bootloader design, and its provision for diagnostic access. The following table provides a high-level overview, followed by detailed, actionable steps.
| Hub Platform | Primary Recovery Method | Local Diagnostic Access | Hardware Actions | Firmware Integrity Check |
|---|---|---|---|---|
| Samsung SmartThings (V2/V3) | Cloud-Initiated Reboot/Reset | account.smartthings.com | 15-second Soft Reset Button Press | Server-side checksum validation |
| Hubitat Elevation (C-5, C-7, C-8) | Local Diagnostic Web Interface (A/B Partitioning) | http://<Hub_IP>:8081 |
Diagnostic Tool Rollback, USB Restore (C-8) | Local checksum validation on device |
| Home Assistant OS (Blue, Yellow, Green, RPi) | SSH / CLI via Supervisor, OS Console | http://homeassistant.local:8123 (main UI), SSH |
ha supervisor repair, USB re-flash (SD/eMMC) |
OS-level package integrity checks |
| Apple HomePod / HomePod mini | iOS Home App Remote Restart | N/A (No local web UI) | Unplug/Replug, Factory Reset via Home app | Secure Boot & Signed Firmware |
Actionable Steps: Step-by-Step Troubleshooting Guide
Before attempting any recovery, ensure your hub is connected via Ethernet Directly to your router or a switch on the same subnet. This eliminates Wi-Fi as a potential point of failure during the recovery process.
Phase 1: Initial Network Diagnostics & Access Attempts
- Verify Physical Connectivity: Ensure Ethernet cable is securely seated and link lights on the hub and router port are active (usually green/amber).
- Ping the Hub:
From a computer on the same network, open a command prompt (Windows) or terminal (macOS/Linux) and attempt to ping the hub’s last known IP address. If you don’t know it:
- Router’s DHCP Client List: Log into your router’s administration interface. Look for a “DHCP Clients,” “Connected Devices,” or “LAN Devices” list. Your hub’s MAC address (often printed on the device) can help identify it.
- Network Scanners: Use tools like Fing (mobile app) or Advanced IP Scanner (Windows) to scan your local subnet for active devices.
   C:> ping 192.168.1.100
   Pinging 192.168.1.100 with 32 bytes of data:
   Reply from 192.168.1.100: Bytes=32 time=5ms TTL=64
   Reply from 192.168.1.100: Bytes=32 time=4ms TTL=64
   ...
If you receive replies, the hub’s network interface is operational, and it has an IP address. If you get “Request timed out” or “Destination host unreachable,” the hub’s network stack is likely down, or it has a different IP.
- Attempt Local Diagnostic Portal Access:
- Hubitat Elevation: Open a web browser and navigate to
http://<Hub_IP>:8081(replace<Hub_IP>with the actual IP address found in step 2). This port bypasses the main Hubitat UI and accesses a lightweight diagnostic web server.+-------------------+ HTTP/8081 +---------------------+ | Your PC/Laptop |-------------------->| Hubitat Diagnostic | | (Web Browser) | | (Bootloader/Recovery)| +-------------------+ +---------------------+ - Home Assistant OS: While the main UI is typically
http://homeassistant.local:8123orhttp://<Hub_IP>:8123, a stalled update might prevent this. For Home Assistant OS, direct console access (via HDMI/keyboard if available) or SSH is often more robust. - SmartThings: Access
account.smartthings.comfrom a web browser. Log in, navigate to “Hubs,” select your hub, and look for “More Options” or “Reboot/Reset” functionalities. This relies on cloud connectivity.
- Hubitat Elevation: Open a web browser and navigate to
Phase 2: Platform-Specific Recovery Actions
A. Hubitat Elevation (C-5, C-7, C-8)
Hubitat hubs utilize robust A/B partitioning, making them highly resilient to update failures. The diagnostic tool is your primary interface:
- Access the Diagnostic Tool: As described above, navigate to
http://<Hub_IP>:8081. - Evaluate Options:
- “Revert to Previous Version”: This is your first and most recommended option if an update stalled. It instructs the bootloader to switch back to the stable firmware partition.
- “Soft Reset”: This preserves your network settings, Z-Wave/Zigbee pairings, and automations but clears the database and rolls back to factory default hub settings. It’s more aggressive than a revert but less than a full factory reset.
- “Download Latest Firmware”: Use this only if “Revert” fails and you suspect the current firmware image is corrupted, but the diagnostic tool itself is stable. Ensure a strong, wired connection.
- “Restore a Backup”: After a “Soft Reset” or if the hub boots successfully but is unstable, you can restore from a previous backup (highly recommended to perform regularly).
- Execute Rollback: Select “Revert to Previous Version” and follow the prompts. The hub will reboot. Monitor its LED status. A solid green usually indicates success.
- (C-8 Specific) Manual USB Flashing: If the diagnostic tool is completely unresponsive or the hub won’t boot, the C-8 model supports a more advanced USB re-flash.
- Download Firmware: Obtain the official
.imgfile from Hubitat’s support portal. - Prepare USB Drive: Use a USB 2.0 drive (8GB-32GB, FAT32 formatted). Use a tool like Rufus (Windows) or BalenaEtcher (macOS/Linux) to write the
.imgfile to the USB drive. - Boot into Recovery: Power off the C-8. Insert the prepared USB drive. Press and hold the reset button (small pinhole) while powering on the hub. Keep holding for 10-15 seconds until the LED changes color (often blue or purple). This forces the bootloader to read from the USB drive.
- Monitor: The hub will flash the firmware from the USB. This can take several minutes. Once complete, remove the USB drive and reboot the hub normally.
- Download Firmware: Obtain the official
B. Samsung SmartThings (V2/V3 Hubs)
SmartThings hubs are heavily cloud-dependent, meaning recovery often involves the SmartThings cloud service.
- Cloud-Initiated Recovery:
- Access
account.smartthings.com. - Go to “My Hubs” and select the problematic hub.
- Look for options like “Reboot Hub” or “Factory Reset Hub.” Attempting a “Reboot” first is advisable.
- Access
- Hardware Soft Reset: If cloud commands fail or the hub is offline:
- Locate the reset button (often a small pinhole on the back).
- Soft Reset: With the hub powered on, press and hold the reset button for 5-7 seconds. Release when the LED changes (e.g., from solid red to blinking yellow). This attempts to restart the hub’s services without losing device pairings.
- Factory Reset (Last Resort): Press and hold the reset button for 15-30 seconds Until the LED blinks red rapidly, then changes to solid red. This will wipe all data, including device pairings and automations. Only use if all other methods fail.
- Monitor LED Status: Refer to SmartThings documentation for specific LED patterns (e.g., solid green = online, blinking yellow = connecting, solid red = error).
C. Home Assistant OS (Blue, Yellow, Green, RPi-based installations)
Home Assistant, being open-source and highly configurable, offers diverse recovery options, primarily via command-line interface (CLI).
- SSH Access:
- Ensure you have SSH access enabled (via the Supervisor -> Add-on Store -> SSH & Web Terminal).
- Connect using an SSH client (e.g., PuTTY on Windows, `ssh` command on macOS/Linux):
Ssh [email protected] -p 22222
(Note: Port 22222 is for the host OS; port 22 is for the SSH add-on container).
- CLI Recovery Commands: Once logged in:
ha supervisor repair: This command attempts to repair issues with the Home Assistant Supervisor, which manages Core, OS, and add-ons. It often resolves update-related problems.ha core update --version <specific_version>: If the core update failed, you can try to re-install a specific version (either the failed one or a known stable previous one). Check community forums or release notes for stable versions.ha os update --version <specific_version>: Similar to core update, but for the underlying Home Assistant Operating System.ha host reboot: A simple reboot if the system is partially responsive.ha supervisor logs/ha core logs: Review logs for specific error messages that can pinpoint the exact failure.
- USB/SD Card Re-flash (for Home Assistant OS on Raspberry Pi, Yellow, Green): This is the most robust method for Home Assistant OS if software recovery fails.
- Download Image: Get the latest official Home Assistant OS
.imgfile for your specific hardware from the Home Assistant website. - Image Writer: Use BalenaEtcher or Rufus to write the
.imgfile to a new (or existing) SD card or eMMC storage. - Boot: Insert the re-flashed storage into your hub and power it on. This will effectively start with a fresh installation. You can then restore a previous Home Assistant backup (
.tarfile).
- Download Image: Get the latest official Home Assistant OS
Phase 3: Router-Side Intervention & Advanced Network Troubleshooting
If the hub remains unreachable despite physical connectivity, the issue might lie with your network infrastructure.
- Temporarily Disable Router Security Features:
- Log into your router’s administration panel.
- Locate settings for “Intrusion Prevention System (IPS),” “Firewall,” “Deep Packet Inspection (DPI),” or “Smart Network Protection” (e.g., Netgear Armor, ASUS AiProtection, Linksys Shield).
- Temporarily disable these features, then attempt to access the hub or trigger a recovery. Remember to re-enable them afterward.
- Check DHCP Server Logs: Some advanced routers allow you to view DHCP server logs, which can confirm if the hub requested and received an IP address.
- Packet Capture (Advanced): For highly technical users, capturing network traffic (e.g., using Wireshark on a mirrored port or a router with packet capture capabilities) can reveal if the hub is sending/receiving data, attempting DNS lookups, or communicating with update servers. Look for dropped packets, TCP retransmissions, or ICMP errors.
Preventing Future Update Failures: Proactive Measures
Prevention is always superior to cure. Implementing robust network hygiene and update practices can significantly reduce the likelihood of encountering a stuck hub.
- DHCP Reservations / Static IP Assignment:
Configure your router to assign a fixed IP address to your smart hub based on its MAC address. This ensures the hub always has the same network identity, even after reboots, preventing IP conflicts or delays in network stack initialization. For an ASUS Router, this is typically under “LAN” → “DHCP Server” → “Manually Assigned IP List.”
   +-------------------+     DHCP Request      +-----------------+
   | Smart Hub         |---------------------->| Router (DHCP    |
   | (MAC: 00:1A:2B...) |                      | Server)         |
   +-------------------+     DHCP Offer        +-----------------+
                           <----------------------
                            (IP: 192.168.1.100)
With a reservation, the router always offers the same IP to that MAC.
- Uninterruptible Power Supply (UPS) Protection:
A power flicker or outage during a firmware write operation is one of the most common causes of flash memory corruption and “bricking.” Connect your smart hub, router, and modem to a UPS. This ensures continuous power, allowing the update to complete safely even during brief electrical disturbances.
- Dedicated Ethernet for Critical Updates:
Whenever a significant system-level firmware update is available, temporarily connect your hub via an Ethernet cable. This bypasses the inherent instabilities and interference of Wi-Fi, ensuring a high-bandwidth, low-latency, and error-free data transfer.
- The 48-Hour Rule & Community Monitoring:
Avoid immediately updating firmware on release day. Instead, wait at least 48 hours and actively monitor community forums (e.g., Hubitat Community, Home Assistant Forums, SmartThings Community) for reports of instability, bugs, or specific issues related to the new firmware version. This allows others to be the “early adopters” and helps you avoid known problematic releases.
- Regular Configuration Backups:
For platforms like Hubitat and Home Assistant, regularly back up your hub’s configuration, device pairings, and automations. Store these backups off-device (e.g., cloud storage, local NAS). In the event of an unrecoverable failure that necessitates a factory reset or re-flashing, a recent backup can save countless hours of re-configuration.
- Optimized RF Environment:
For Wi-Fi-connected hubs, ensure your 2.4GHz Wi-Fi channels are optimized to minimize interference. Use a Wi-Fi analyzer app to identify the least congested Wi-Fi channels (1, 6, 11 are preferred). If your hub also uses Zigbee or Thread, consider configuring your Wi-Fi to use channel 1 or 6, and your Zigbee/Thread network to use channel 25 or 26, which are largely outside the primary Wi-Fi spectrums. Position your hub away from sources of interference like microwave ovens, cordless phones, and large metal objects.
Frequently Asked Questions (FAQ)
Q1: What do different LED patterns on my smart hub indicate during an update?
A: LED patterns are crucial diagnostic indicators. While specific patterns vary by manufacturer and model, general interpretations include:
- Solid Green/Blue: Usually indicates normal operation, online, or update complete.
- Blinking Blue/White: Often signifies booting, connecting to network/cloud, or actively downloading/installing an update.
- Solid Amber/Yellow: Can indicate a network issue (e.g., no IP, no cloud connection), a minor error, or waiting for configuration. If prolonged during an update, it suggests a stall.
- Blinking Amber/Yellow: Often means attempting to connect, or a recoverable error state.
- Solid Red: A critical error. The hub may be offline, corrupted, or unable to boot.
- Blinking Red: A severe error, often indicating a failed boot, corrupted firmware, or readiness for a factory reset.
Always consult your hub’s specific user manual or support documentation for precise LED interpretations.
Q2: Is it safe to pull the power from my hub if it’s stuck in an update?
A: It is generally NOT recommended as a first resort. While modern hubs with A/B partitioning (like Hubitat) are designed to be resilient to power loss during an update (as the update is written to an inactive partition), there’s still a risk. If the power is cut during a critical write to the bootloader or the active partition (if A/B isn’t fully implemented or has failed), it can lead to permanent corruption. Always attempt software-based recovery (diagnostic portal, CLI) first. If a power cycle is unavoidable, wait at least 60 minutes to ensure the hub isn’t still actively trying to recover or write to flash, and then disconnect power for a full 30 seconds before reconnecting.
Q3: Can a firmware update permanently brick my smart hub?
A: While rare with modern hubs due to A/B partitioning and protected bootloaders, permanent bricking is possible if the bootloader itself becomes corrupted, or if flash memory is physically damaged during a power event. Most “bricked” hubs are actually “soft-bricked” and recoverable via advanced methods like diagnostic portals, USB re-flashing, or manufacturer RMA processes. True hardware failure from an update is uncommon but not impossible.
Q4: How often should I update my hub’s firmware?
A: A balanced approach is best. Timely updates are crucial for security patches and critical bug fixes. However, immediately updating on release day carries a higher risk of encountering new, undiscovered bugs. A good strategy is to:
- Enable automatic minor updates if available and the manufacturer has a strong track record.
- For major version updates, wait 24-48 hours and monitor community forums for widespread issues before initiating.
- Perform critical updates (especially security-related ones) within a week or two of release.
- Avoid updating right before you leave for vacation or during periods when you cannot quickly troubleshoot.
Q5: What if my hub doesn’t have a local diagnostic portal or SSH access?
A: Some hubs (e.g., older SmartThings models, some Zigbee/Z-Wave stick controllers) rely entirely on cloud services or manufacturer-specific desktop applications for updates and diagnostics. In such cases:
- Ensure the hub has internet access.
- Check the manufacturer’s cloud portal or desktop app for recovery options.
- Perform manufacturer-specific hardware resets as documented.
- As a last resort, contact the manufacturer’s technical support. They may have proprietary tools or processes for recovery, or offer an RMA if the device is truly unrecoverable.
Q6: What is the difference between a “soft reset” and a “factory reset”?
A:
- Soft Reset: Typically clears the hub’s internal database, runtime state, and possibly some network settings, but retains core configurations like Z-Wave/Zigbee radio pairings, device definitions, and sometimes even automations. It’s akin to reinstalling the operating system while keeping your personal files. This is often used to resolve software glitches or database corruption without requiring a full re-pairing of all devices.
- Factory Reset: This is a complete wipe. It reverts the hub to its out-of-the-box state, deleting all configurations, device pairings, network settings, and user data. It effectively makes the hub “new” again. This is a last resort, as it requires re-pairing every single smart device and re-creating all automations.
Always attempt a soft reset before a factory reset if given the option.
Conclusion
A smart hub stuck in a firmware update loop can be a frustrating experience, but with a systematic, technical approach, most situations are recoverable. Understanding the intricate layers where failures can occur—from network packet integrity to flash memory writes—empowers you to diagnose the problem effectively. By leveraging diagnostic portals, command-line tools, and understanding hardware-level recovery mechanisms like A/B partitioning and USB re-flashing, you can restore functionality without resorting to immediate, potentially damaging power cycles.
Proactive measures, including robust network configuration, power stability (UPS), and cautious update practices, are your best defense against future incidents. Remember, your smart home’s central nervous system deserves careful attention and informed maintenance to ensure its continuous, reliable operation.
About these guides
These guides are compiled and maintained by the Smart Home Expert editorial desk. Each one is built from manufacturer documentation and the published Zigbee, Z-Wave, Thread and Wi-Fi specifications, then written up as a diagnostic sequence you can follow in order. Found something that does not match your hardware? Tell us and we will correct the sheet.
Specifications and references
The primary documentation for the protocols and products discussed above. Where this guide gives a figure — a frequency, a voltage, a timeout — these are where it comes from.